PDF Advanced Options
![]() Reference Contents > General Program Functions > PDF Advanced Options
Reference Contents > General Program Functions > PDF Advanced Options
This window opens from 2 places:
- File — Report Destination — Settings, then select BrainyPDF and switch to the Preferences tab pane. Finally click on the Advanced… button. This is to set properties for default printing to PDF for all reports that do not have specific settings of their own.
- Individual report designs can have their own settings that override the default settings in 1 above. This window, therefore, also opens from the File — Advanced — Report Setups window.
Most settings for the PDF Device report destination are set in this window. However, some settings can be intelligent to the context of the report, such as the watermark text and Title. See details below.
When printing to Acrobat PDF you will be asked for a file name and destination. When used with Email the filename is normally the report class name. For documents the filename can be context-sensitive as in the following cases:
SO-Sales Order number
IN-Invoice number
CN-Credit Note number
DN-Dispatch Note number
QU-Quotation number
CBD-Cash-Before-Delivery Invoice number
CR-Customer Remittance Advice Note using customer code and date
CS-Customer Statement using customer code and date
QACert-QA Certificate with batch or part number
Est-Estimate job code
Job-Job code
EstAck-Estimate Acknowledgement with job code
JobAck-Job Acknowledgement with job code
JobPick-Job Picking List with job code
JobMake-Job Make-To List with job code
JobList-Job Picking and Make-To List with job code
QASpec-QA Specification with part number
GR-Goods Received Note number
PO-Purchase Order number
RN-Return Note using purchase order number
RQ-Request for Quotation number
SR-Supplier Remittance Advice Note using supplier code and date
SS-Supplier Statement using supplier code and date
|
Button |
Action |
|---|---|
|
OK |
The OK button updates the data you have entered, or confirms the selection and/or processes the function you have called.
|
|
Cancel |
Aborts the process currently in session. The keyboard equivalent is the Esc key for Windows computers and Command-.(full stop or period) for the Mac. |
|
Remove Settings from Reports |
Click to remove specific PDF settings form the selected reports so that default settings will apply to them. This button is only available when the window has been opened from the File — Advanced — Report Setups window. |
The window has 8 tab panes.
General
Watermark
Document Info
Viewer
Outlines
Compatibility
Background
Security
General
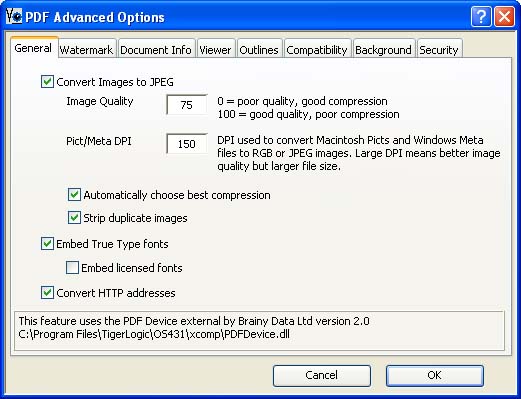
Controls for image quality
|
Field |
Description |
|---|---|
|
Convert Images to JPEG |
Convert Images to JPEG: Converting images to JPEG may reduce the quality. If this option is not selected, 24 bit RGB values are compressed using standard deflate compression with no loss of quality, but possible loss of compression. |
|
Image Quality |
A value of 75 generally produces a |
|
Pict/Meta DPI |
This option controls the quality of Macintosh PICT and Windows Meta picture conversion. Valid range is 72 to 600. Default is 150. Increasing the resolution to improve quality will increase the size of the PDF file. |
|
Automatically choose best compression |
Automatically choose best compression: Let the software choose the best compression. This option, if enabled, may affect performance. |
|
Strip duplicate images |
Strip duplicate images: Duplicate images will be removed and only one occurrence of the image is embedded. |
|
Embed True Type fonts |
Embed True Type Fonts: This options will subset and embed true type fonts for better cross platform results. |
|
Embed licensed fonts |
Embed licensed fonts: This option embeds copyrighted fonts. Please make sure that you have a license that permits the embedding of these fonts. If you are unsure, do not select this option. |
|
Convert HTTP addresses |
Convert HTTP addresses: This option converts any occurrences of the text “http://” and the text “www.” to Link annotations. Links to files on disk can also be established by using standard URI paths beginning with “file://”. |
Watermark
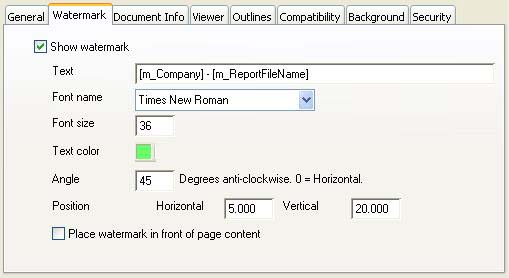
Places watermark text across each page of the output.
|
Field |
Description |
|---|---|
|
Show watermark |
If checked a watermark is printed on every page. |
|
Text |
The watermark text.
|
|
Font name |
Choose a font name from the list of fonts on your system. |
|
Font size |
Choose a font size. |
|
Text colour |
Choose a text colour from the colour picker. |
|
Angle |
The rotation angle for the text from -180 to 180 degrees. |
|
Horizontal Position |
The horizontal starting position from the left of the paper edge, measured in centimetres. |
|
Vertical Position |
The vertical starting position from the top of the paper edge, measured in centimetres. |
|
Place watermark in front of page content |
When checked the watermark will appear in front of the page content. |
Document Info
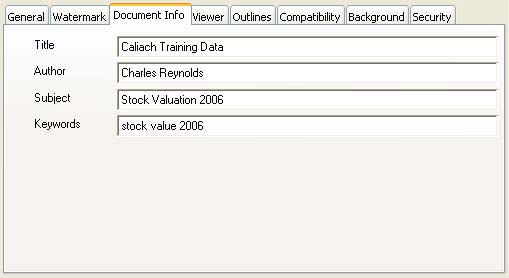
Document Summary Properties that can be viewed by the user.
|
Field |
Description |
|---|---|
|
Title |
The Title shown in the document summary by the PDF reader.
|
|
Author |
The Author shown in the document summary by the PDF reader.
|
|
Subject |
The Subject shown in the document summary by the PDF reader.
|
|
Keywords |
The Keywords shown in the document summary by the PDF reader. |
Viewer
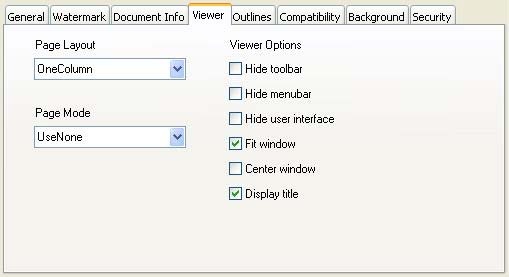
Settings for the PDF Viewer when the document is opened by a reader.
|
Field |
Description |
|---|---|
|
Page Layout |
SinglePage – Display one page at a time. OneColumn – Display the pages in one column. TwoColumnLeft – Display the pages in two columns, with odd-numbered pages on the left. TwoColumnRight – Display the pages in two columns, with odd-numbered pages on the right. |
|
Page Mode |
UseNone – Neither document outline nor thumbnail images visible. UseOutlines – Document outline visible. UseThumbs – Thumbnail images visible. FullScreen – Full-display mode, with no menu bar, window controls, or any other window visible. |
|
Hide toolbar |
Hide the viewer application’s tool bar when the document is active. |
|
Hide menubar |
Hide the viewer application’s menu bar when the document is active. |
|
Hide user interface |
Hide user interface elements in the document window, such as scroll bars and navigation controls. |
|
Fit window |
Resize document window to fit the size of the first page. |
|
Center window |
Position the document’s window in the centre of the display. |
|
Display title |
Display the document title as specified by the document info in the title bar. |
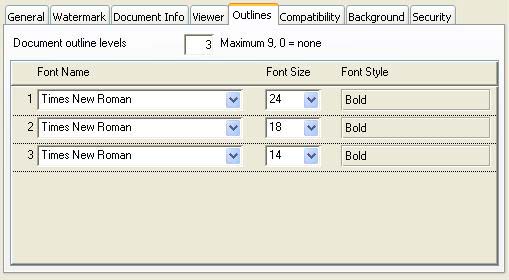
Outlines
The PDF Device can produce outline trees (bookmarks) based on the font size and style of the report output.
|
Field |
Description |
|---|---|
|
Levels |
You can have up to 9 levels of outline structure. |
|
Font Name |
Select a font from those in your system. |
|
Font Size |
Select a font size. |
|
Style |
Right-click to choose style attributes from the context menu. |
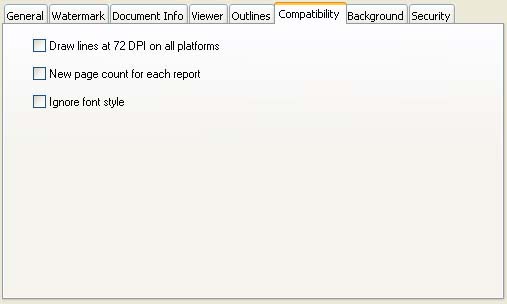
Compatibility
Compatibility Options.
|
Field |
Description |
|---|---|
|
Draw lines at 72 DPI on all platforms |
Line thickness is normally calculated based on the platforms display resolution. That means that lines are drawn slightly thicker on Windows platforms. Checking this option on will ensure that line thickness is based on 72dpi resolution on all platforms. |
|
New page count for each report |
Normally page count objects would display a single page range, even when printing multiple reports to the same PDF file. This may be desired. Checking this disables this |
|
Ignore font style |
By default, PDFDevice will not embed fonts if the font file does not contain glyph data for the requested style. Turning on this option forces PDF device to embed the available glyph data even if the styles are not supported by the font. |
Background
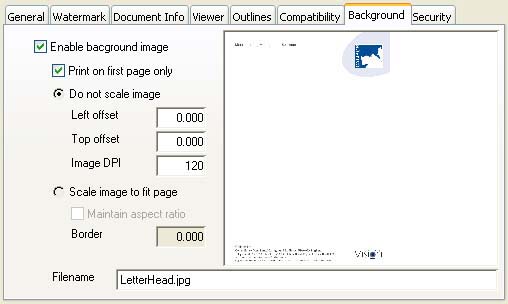
Background Image options.
Printing background images on reports sent to the PDF report destination or when reports are sent to the Email destination and those are created as PDF attachments to the email can be useful. In particular, where you want to place a generic logo or other graphic to personalise the PDF output.
![]() TIP: Often, you may also print documents normally to your printed headed paper, for example for marketing letters or customised documents such as invoices and purchase orders. In this case printing to the PDF or Email destination would leave the resulting document bereft of the normal headed paper visual appearance. However, the use of a background image of a scanned graphic of your headed paper can leave the output identical to your normal printed document. To do this you may probably be best off setting individual report designs to have the appropriate background image settings from the File — Advanced — Report Setups window after first opening your OpenVision.lbs using the File — Advanced — Custom Features Utility function.
TIP: Often, you may also print documents normally to your printed headed paper, for example for marketing letters or customised documents such as invoices and purchase orders. In this case printing to the PDF or Email destination would leave the resulting document bereft of the normal headed paper visual appearance. However, the use of a background image of a scanned graphic of your headed paper can leave the output identical to your normal printed document. To do this you may probably be best off setting individual report designs to have the appropriate background image settings from the File — Advanced — Report Setups window after first opening your OpenVision.lbs using the File — Advanced — Custom Features Utility function.
|
Field |
Description |
|---|---|
|
Enable background image |
Check this option to print a background image. |
|
Print on first page only |
When checked the background image will only print on the first page. Report class methods can be used for more complex conditions. |
|
Do not scale image |
The image will be rendered actual size. |
|
Left offset |
The horizontal starting position from the left of the paper edge, measured in centimetres. |
|
Top offset |
The vertical starting position from the top of the paper edge, measured in centimetres. |
|
Image DPI |
The image Dots-per-inch that it should be rendered at. |
|
Scale image to fit paper |
The image will be rendered scaled to fit the page within the border chosen below. |
|
Maintain aspect ratio |
When checked the background image height-to-width proportions will be maintained when scaling. |
|
Border |
The border size in centimetres for the background image (distance of image from edge). |
|
Image data |
The background image. You can paste from the clipboard or use the Edit — Paste from File function. A filename below will overwrite an image posted here.
|
|
Filename |
As an alternative to a picture stored in the data or report class, you can enter a file name with suffix. This file must be stored in the Graphics folder beside the datafile.
|
Security
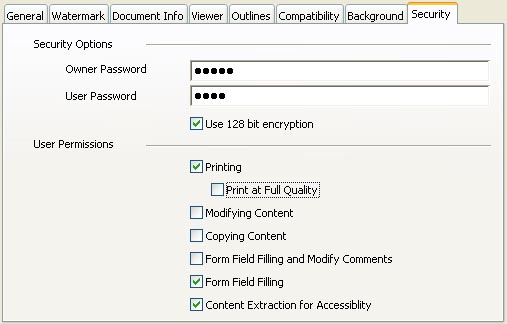
Provides options for document encryption with owner and user passwords.
These settings specify the security options and user permissions for the PDF document. Documents will be encrypted if either one of the Owner or User passwords is supplied. If both passwords are empty, no encryption takes place.
![]() TIP: Note: If a user-password is specified but the owner-password is empty, PDF viewers may only provide user access permissions to the resulting PDF document. They may not provide a way for entering an empty password for full Owner permissions.
TIP: Note: If a user-password is specified but the owner-password is empty, PDF viewers may only provide user access permissions to the resulting PDF document. They may not provide a way for entering an empty password for full Owner permissions.
![]() TIP: Note: If a owner-password is specified but the user-password is empty, a user will not be prompted to enter a password when opening the document and operations will be limited according to the permissions. Some viewers allow the subsequent entering of the owner password for full access permissions.
TIP: Note: If a owner-password is specified but the user-password is empty, a user will not be prompted to enter a password when opening the document and operations will be limited according to the permissions. Some viewers allow the subsequent entering of the owner password for full access permissions.
These settings apply generally, stored for each user. They can also be stored against a report class in when that class of report is printed to PDF, or as a PDF attachment to an email, the specific report class settings overwrite the user’s general settings temporarily. See the special note under User Password below for a third level of control specific to the recipient of the document.
|
Field |
Description |
|---|---|
|
Owner password |
If there is either an owner or user password or both the PDF document will be encrypted. If an owner password is provided only the owner will have full access to the document. |
|
User password |
If there is either an owner or user password or both the PDF document will be encrypted. If a user password is provided restricted access is granted for the document controlled by the user permissions.
|
|
Use 128 bit encryption |
Check to use 128 bit encryption (40 bit encryption is used if not checked). |
|
|
User Permissions: |
|
Printing |
Allow Printing in low quality or full quality if Allow Printing in Full Quality is checked. |
|
Print at Full Quality |
Print the document to a representation from which a faithful digital copy of the PDF content could be generated. When this option is unchecked, printing is limited to a low-level representation of the appearance, possibly degraded quality. |
|
Modifying Contents |
Modify the contents of the document by operations other than those controlled by Form FIeld Filling and Document Assembly. |
|
Copying Content |
Copy or otherwise extract text and graphics from the document by operations other than that controlled by Content Extraction for Accessibility. |
|
Form Field Filling and Modify Comments |
Add or modify text annotations, fill in interactive form fields, and, if Modify Content is checked, create or modify interactive form fields (including signature fields). |
|
Form Field Filling |
Fill in existing interactive form fields (including signature fields). |
|
Content Extraction and Accessibility |
Enable extracting of text and graphics (in support of accessibility to disabled users or for other purposes). |
|
Document Assembly |
Enable document assembly (insert, rotate, or delete pages and create bookmarks or thumbnail images). |
| See also: – |
Compiled in Program Version 5.10. Help data last modified 29 Nov 2016 04:23:00.00. Class wPDFDevOptions last modified 18 Jun 2017 10:59:49.
![]() Reference Contents > General Program Functions > PDF Advanced Options
Reference Contents > General Program Functions > PDF Advanced Options