OVERVIEW
All maintenance functions are performed using either the toolbar tools or from the Marketing Menu.
File Path
Masters > Marketing > View
This file path takes you to the Marketing Data Maintenance window. This window has four tabs.
Business Tab
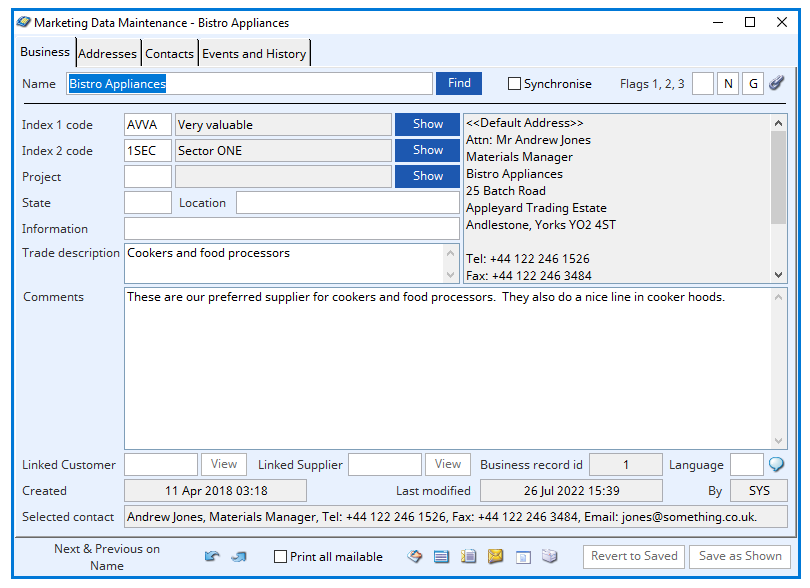
Name
Company name of customer. Unlike Customers, marketing business records have an automatically assigned number to identify a record, but the company name is the unique key field for the file.
Find button
This button puts the system in ‘find’ mode.
Synchronise
Check if you want any changes to index and default project codes to be synchronised with linked customers and addresses/contacts with both linked customers and suppliers. This is subject to optMarketSyncAvoid option.
Flags 1,2,3
These marketing business flags are used to sort information when printing reports.
Link icon
Click to view any linked external files. Hold the shift key down and click to create a new file link for the record.
Index 1 Code
Code and name of index code 1.
Index 2 code
Code and name of index code 2.
Project
Code and name of project code.
Marketing Project Codes are entered on the following data records:
Marketing Events
Marketing Businesses
Customers
Quotation and Sales Order Headers
Quotation and Sales Order Line Items
Jobs and Estimates (but not lines)
Sales History
Sales Commissions
In all cases entering a code is optional (i.e. it can remain blank, unlike normal Index Codes), but if a code is entered, it must be pre-defined in the File — System Manager — Index Codes Maintenance window.
With all the above data files the marketing project code can be used for selection and sort in reports and other functions.
The following rules apply to the flow of codes across records:
New Marketing Events default to the Marketing Business project code.
New Marketing Businesses created from Customers default to the Customer project code.
When Synchronisation is in force, linked Customers have the same project codes as Marketing Businesses.
When a Quotation, SO, Job or Estimate is created, the header project code defaults to that of the Customer selected.
Quotation or Sales Order Line-Item project codes default to the current header project code.
Sales History and Sales Commission project codes derive from the originating Sales Order Line Items or Job header. In the case of A/R Invoices the project code defaults to the Customer’s.
Sales History project codes can be changed in the Process — Sales Dispatch — Amend History References window.
Sales Commission project codes can be changed in the Process — Sales Dispatch — Review Sales Commissions window.
Show buttons
Click these buttons to display a list of alternatives for the field alongside the button. Double-clicking on a list line will enter the value from the list.
Address field
The default address for this customer.
State
State code
Location
Location key word
Information
Relevant information.
Trade description
Trade description
Comments
Relevant comments are entered here.
Linked Customer
Link to customer with CUSCODE.
You can drag a customer from the Customer Scratchpad to link a customer to a marketing record. Linking in this way can provide powerful Customer Relationship Management capabilities.
View button
When linked to a customer or supplier, the View buttons will become active.
Linked Supplier
Link to Supplier with SUPCODE.
You can drag a supplier from the Supplier Scratchpad to link a supplier to a marketing record. Linking in this way can provide powerful Supplier Relationship Management capabilities.
Business Record ID
Company record identifier from MCNDEA.
Language
Language code.
For details of the Language Swap system for which this can be used see Introduction to the Language Swap System.
Language Swap icon
Clicking the language swap icon will bring up the Language Swap Maintenance by Record window.
Created
Date and time the record was created.
Last modified
Date and Time of last update.
The system automatically updates two control fields that are shown. The date and time of the last change to the record and the User ID of the person changing the data. The last modified date and time can be used in selection, so that you can select all records modified since date/time.
by
User ID of last update.
Selected contact
The currently selected contact.
Next & Previous on name
Shows the Previous or Next record using the key field shown at the bottom of the window. You can cycle through the key fields by double-clicking on the text note.
Print all mailable
Print copies of letters, envelopes, labels etc to all contacts marked mailable as well as the default contact on the default address.
Clipboard icon
Copy name and address to clipboard.
Show listing window icon
This brings up the Marketing Listing window.
Standard letter icon
To print a standard letter to the selected contact. This will open the Standard Letter Selection window.
Print envelope icon
To print an envelope for the selected contact.
Print label icon
To print a 4×4 printed label for the selected contact.
Print contact details icon
Print contacts details.
Revert to saved button
To revert any changes to the previously saved version.
Save as shown button
To save the changes you have made to the data file.
Address tab
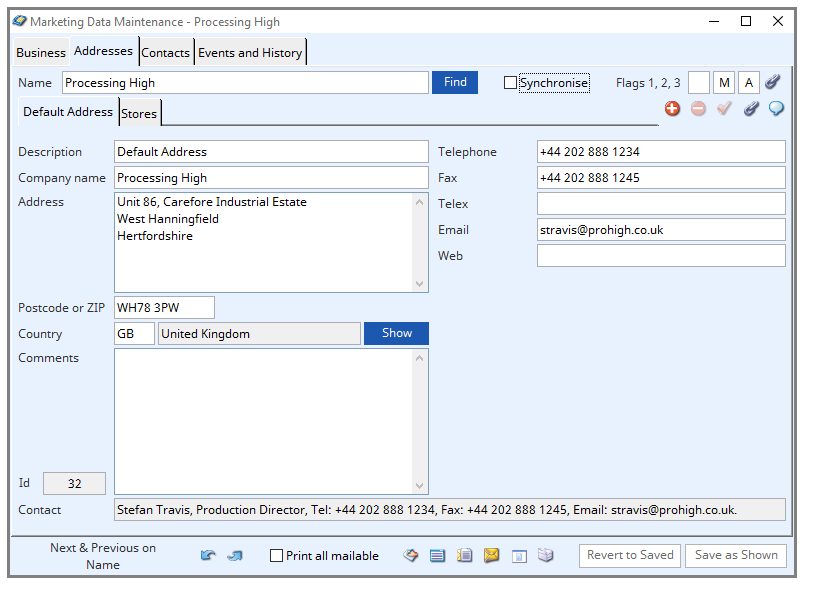
Default address and alternative addresses. Some address-specific defaults such as Tax Regime is also maintained here.
Addresses are maintained in the Address Maintenance Subwindow. See that for help.
Plus icon
Select to add new address to customer.
Minus icon
Delete the current address.
Tick icon
Click to set the current address as default.
Link icon
Click to view any linked external files. Hold the shift key down and click to create a new file link for the record.
Language swap icon
Click to open Language Swap Maintenance by Record or File window.
Address Tabs
Description
Address description for internal identification.
Company name
Company name typically copied from parent record.
Address
Company address.
Postcode or ZIP
Company postcode or Zip code.
Country
Country code and description.
Show button
Click to display a list of alternatives. Double click on list line to enter that value.
Comments
Relevant comments.
ID
Serial number identifier generated from MCDCAD.
Contact
Selected contact for the selected address.
Telephone
Telephone number.
Fax
Fax number.
Telex
Telex number.
Contact email address.
Web
Business web address.
Contacts tab
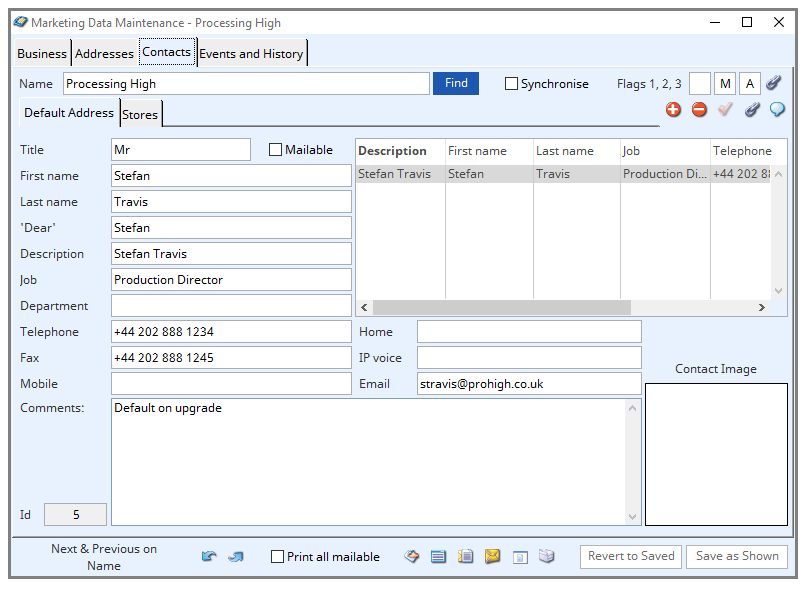
Contacts are maintained in the Contact Maintenance Subwindow.
Title
Salutation (eg. Mr).
Mailable
Contact can be mailed to (the default contact is always mailable).
First name
Contacts first name.
Last name
Contacts last name.
‘Dear’
Salutation for letter
Description
Contact description for internal identification.
Job
Contacts Job title.
Department
Contacts department within the business.
Phone
Contacts telephone number.
Fax
Contacts fax number.
Mobile
Contacts mobile number.
Comments
Relevant comments.
ID
Serial number identification generated from MCDADC.
Description field
List of all contacts for the selected address.
Home
Contacts home telephone number.
IP Voice
Contacts IP voice over internet ‘telephone’ number.
Contacts email address.
Contact Image
Photo picture of the contact can be used in customisation (In Vision 1:1 ratio is expected). To enter an image, right click and select past from clipboard.
Events and History tab
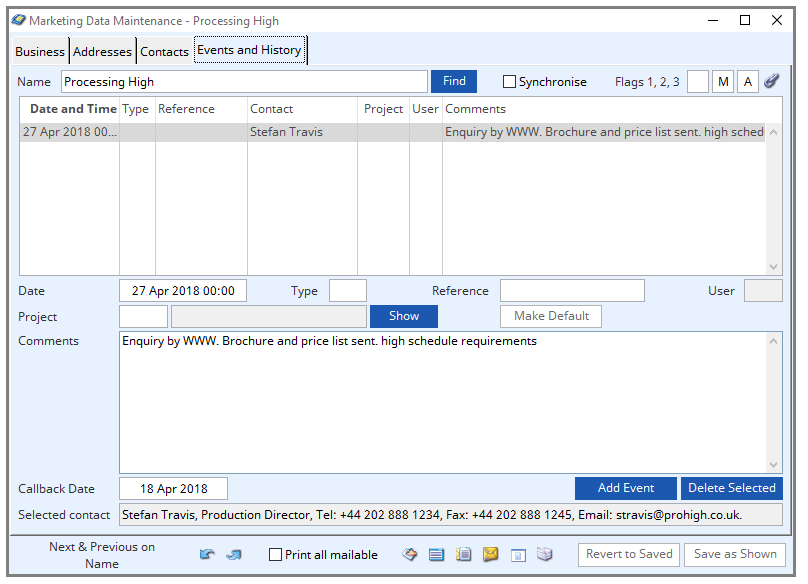
Event and History field
List of events recorded against the business.
Date
Date and time of highlighted event.
Type
Marketing code of event.
Reference
User reference for event.
User
System user id of person who generated the event.
Project
Marketing project code and description.
See the Marketing Business section for more details of Marketing Project codes and their use.
Show button
Clicking this will show a list of all available default marketing project codes. Double click on code line to select this code for the event.
Make Default
Click to make the business default project the currently selected project.
Comments
Relevant comments.
Callback date
Date for next call back.
Add Event button
To add a new event to the event list for this business. The Contact that is associated with the new event is that which is currently selected in the Address/Contacts tab panes and shown at the bottom of the Events tab pane. You can change it will the List context menu.
Delete Selected button
To delete the selected events from the event list for this business.
Selected contact
The currently selected contact.
Also see: |
|
Compiled in Program Version 6.00. Help date last modified on 27 July 2022
Class wMarketMaint last modified 25 May 2022.