OVERVIEW
The Parts Maintenance window is where the information for each part is entered or amended.
File Path
Masters > Parts > View
This file path takes you to the Parts Maintenance window. This window has nine tabs.
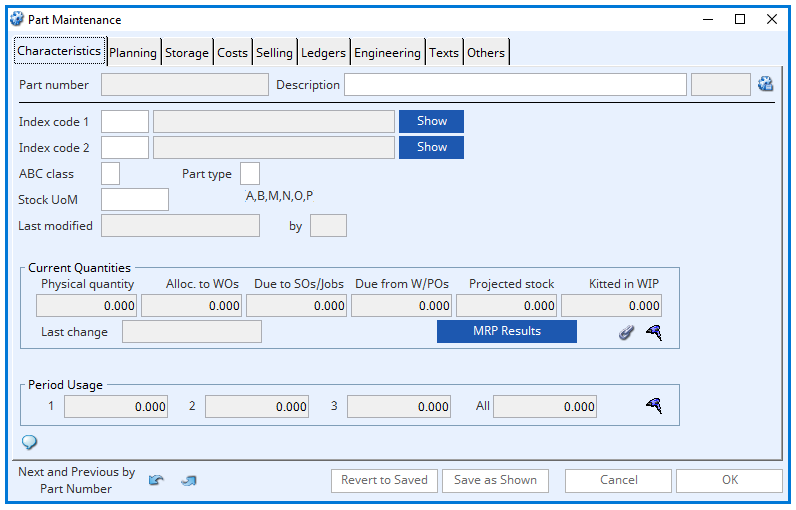
CHARACTERISTICS TAB
Part Number
The unique upper case, alpha numeric part identifier of up to 18 characters.
DO: Have only limited grouping prefixes and don’t try to be too specific as this can tend to lead to errors in grouping after a while,
DO: Have a fixed number of numeric sequence characters after the grouping prefix (e.g. AHD00080 rather than ADH80). Part numbers are character sorted so always pack numbers with zero characters (watch you don’t use the letter ‘O’!). “AHD00220” will sort ahead of “AHD080”.
TRY: To have a fixed length for both grouping prefix and overall number as this will make reading down columns of part numbers easier.
DO: Group parts with a prefix by what the parts physically are, e.g. Screw, Special Bolt or Transistor.
NEVER: Have any grouping or number reference based on where the part is used on products or higher assemblies, as the BoM structure determines this. You should also avoid building in a supplier or customer into the number. Also, when you add another product to your production (as you inevitably will) which also uses this part, serious confusion will arise. Duplication of the same part usually occurs which leads to gross inefficiency. For example: Screw for 80Mb drive, Special Bolt for Model 24 crane, 60W PSU Transistor.
DON’T: Make part numbers excessively long – it can lead to a good deal of unnecessary typing over the years!
DON’T: Excessively use delimiter marks to separate segments of the part number, such as ‘-‘, ‘/’, ‘.’, etc.. It adds to typing and can cause problems if you export parts data to spreadsheets. This also applies to all figure numbers where you have leading zeros.
REMEMBER: You, and all your current and future colleagues, will have to live with your part numbering system indefinitely. Take great care, and involve others, in setting your policy. Once you have set it, stick to it like a limpet!
Description
The mandatory up to 40-character basic description of the part. This description is used throughout the system and needs to be limited so lists and reports can have useful column space for other data. Additional descriptive text can be entered for use selectively on Order documents
Parts Scratchpad Icon
Clicking this icon will open the parts scratchpad with the selected part number pre-entered.
Index code 1
A mandatory code assigned to the Part that can be used throughout the system to select or sort Parts. For example, it can be used to group Parts into classes such as switches, relays, pcb’s, etc..
Index Codes must be pre-defined in the Index and Other Code Maintenance window before being assigned to a Part.
Index code 1 – Description field
Description of the index code selected.
Index code 1 – Show button
Selecting the Show button will show a list of currently defined codes. When editing a part, double-clicking on a list line will load the code selected.
Index code 2
Another mandatory code assigned to the Part that can be used throughout the system to select or sort Parts by. It is similar in characteristics to Part Index code 1, although independent from it.
Index code 2 – Description field
Description of the index code selected.
Index code 2 – Show button
Selecting the Show button will show a list of currently defined codes. When editing a part, double-clicking on a list line will load the code selected.
ABC Class
When Materials Requirement Planning calculates the demand for manufactured or purchased Parts, it can optionally assign a classification to each Part to identify its significance to the business. This significance is determined by the total turnover in value of Parts within MRP identified demand. This-Level Current Cost value is used for ABC calculations, which enables the ABC Analysis to relate to added value of assemblies which is more useful that straight cost value. This can be useful in helping concentrate management time to the most significant Parts. “A” class Parts are the most significant and “E” class parts are the least significant. The break points in terms of % of total MRP demand value can be set in the “System Manager” “Company Details”. An “E” ABC class indicates that MRP found no demand for the Part. The ABC class can be edited to any upper case character in the maintenance window.
Part type
Only A, B, M, N, O or P can be entered here, with a meaning as follows:
A: The Part sourcing will be automatically deduced when running MRP: If the Part has a Bill of Materials and there are no open Purchase Orders for the Part then it will be considered a manufactured part. If this condition is not met the Part will be considered to be a purchased part.
B: The Part is a purchased part regardless of it having a Bill of Materials.
M: The Part is a manufactured part regardless of it not having a bill of material. This is useful when the part is manufactured from free-issue material that is not included of the inventory system. Costing will calculate any process route for the part.
N: A non-stock part such as a drawing, fixture, casting pattern etc. The part can have all the attributes of a normal Part but it cannot be processed as a stock item or have a Bill of Materials or Process Route. However, it can be used on a Sales Order, although with no effect on stock. This is useful for standard delivery charges, services, and the like. Once you create a non-stock part you cannot change it to another part type.
O: The Part is an Outwork assembly that is manufactured by a sub-contractor, the components of which are supplied from stock and must be accounted for. i.e. for “O” items MRP will plan to obtain the components as though the Part is to be manufactured under a Work Order, however, it will recommend an Outwork Purchase Order. Costing will take the Purchase Price on the Outwork Purchase Order. The Part, when ordered, is treated in the same way as a Purchase Part but flagged as Outwork. If you duplicate a type “O” part, the new part record will default to a type “A”. An Outwork assembly can contain Phantom assemblies within them which will be blown-through, and this will operate on a multi-level basis.
P: The Part which is a Phantom assembly only exists in production (or in Outwork kits) as an intermediate stage in the manufacture of a higher assembly. Phantom Assemblies can be end products in the form of kits of their components. They can also be Purchase Kits where kit components are received rather than the parent. Phantom Assemblies are never stocked themselves, only their components. Nor should they have a process route as they are never made as such. If you duplicate a type “P” part, the new part record will default to a type “A”.
If a Work Order is prepared for a Parent whose assembly contains a component that is a Phantom type, the Phantom assembly components will be consolidated with the WO parent’s other components for kitting purposes. This is a very valuable feature that enables the design of a product’s structure to be very much more efficient, intuitive, and convenient in production than otherwise. A Phantom Parent never physically exists in the production process and does not have a Process route. This also applies to Outwork Assemblies.
For example, a circuit board may have several integrated circuits along with other components. For convenience the business may desire to maintain the integrated circuits as an independent BoM. However, the ic’s are always used with the other components, and at the same time, to make the circuit board and never physically exist in the stock room as a set of ic’s. In this case the Parent of the bill of ic’s is given a Phantom part type. As far as the computer database is concerned the bill of ic’s is like any other bill. As far as production is concerned the bill of ic’s does not exist as a separate entity and the ic’s are consolidated into the bill of the Parent that calls the ic Phantom assembly.
A Phantom assembly can also be used for collections of parts that are kitted at sales delivery time. A business may sell repair kits or spare part kits that are not stocked in the storeroom as a separate collection of components. If this is the case, the parent of the spare part kit BoM should be given a Phantom part type. When a sales order is prepared for a Phantom parent the paperwork blows-through the bill and lists the components separately. The dispatch process would involve the stockman collecting the individual parts of the Phantom for the dispatch. If kit items are shortages on dispatch, Caliach Vision will support control of the shortage.
A Phantom assembly can also be ordered on a purchase order in which case you will receive a collection of parts that is the kit. There is no concept of shortages in this use of a phantom. For costing to correctly distribute purchase costs amongst its kit components, the phantom part must have a purchase part record (please see the Roll-Up assembly current costs section of Product Costing for more details). For correct operation in MRP the parent needs to have a purchase part record and at least one component needs to have the For supplies of the part MRP will order PO Kits checkbox checked. For the full implications to MRP see the Treatment of Purchase Order Kits section in the MRP Menu topic.
Phantoms can be multi-level. i.e. A Phantom assembly can itself contain other Phantom assemblies. In the case of a SO Kit, the store person is provided with a consolidated component list.
Stock UoM
This is a unit of measure descriptive field that represents the standard stock unit for the Part. E.G. “Each”, “Metre”, “Foot”, etc.. For a new part, the default is the Stock UoM default entered in the “System Manager” “Company details”.
Alternative units can be assigned for sales and purchasing. Great care should be taken if you want to change the Stock UoM quantity significance, especially if the part is a BoM Component.
Last modified
This shows the date and time the master settings were modified.
Last modified by
This shows who last modified the master settings.
Current Quantities field
Physical quantity
This is the parts current inventory physical quantity. This figure does no include any quarantined stock, sales order bonded quantity or parts issued to jobs. It is the quantity available in stock.
Alloc. To WOs
This shows the quantity allocated to Work Orders. This does not include quantity that is to be used on backflushed work orders.
Due to SOs/Jobs
The quantity subject to confirmed Sales Orders and Jobs show here. Phantom type parts are not shown but kit items are.
Due from W/POs
This is the quantity due from work and purchase orders.
Projected stock
This is the projected stock quantity based on the physical, less allocated to WO’s, less due to SOs and Jobs, plus any due from WOs or POs.
Kit in WIP
The quantity kitted to incomplete Works Orders are shown here. This does not include backflushed order kits and indicates only what is in normal work order wip.
Last change
This is the last modified date and time of quantity values for the parts.
MRP Results button
Selecting this button will open the MRP Results listing for the part.
Link icon
Click this icon to view any linked external files. Hold the shift key down and click to create a new file link for the record.
Drill down icon
Double clicking this icon will open the Projected Stock Process Analysis window.
Period usage fields
These are system generated fields that record the Period Usage of a part. Quantities for the last three periods are recorded. These fields cannot be edited. You can roll-over the quantities either in the Period File Update window or at regular optional intervals at the time of a Ledgers A/R Month End (this must be set in the Account Manager Controls Maintenance window).
Alternatively, you can populate their values over date ranges from Inventory History, which is done in the Period File Update window.
Double-click on any field to get a stock history listing.
Period usage ‘All’ field
Total part usage quantity for all three periods.
Drill down icon
Double click the icon to drill down data.
PLANNING TAB
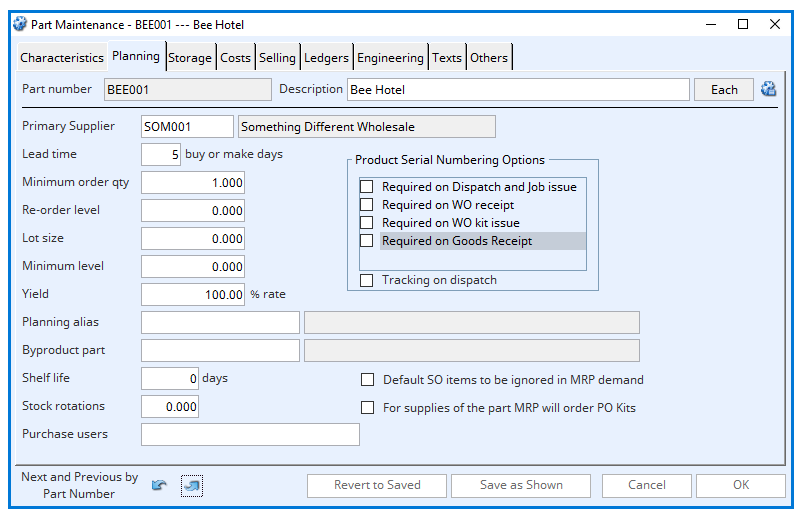
Primary Supplier
This is the code and name of the preferred source for a purchased component. MRP uses the Primary Supplier in reports to facilitate purchasing administration. It can also be edited to any Purchase part relationship within the Purchase parts maintenance window. It may also be set as part of the Global Purchase Parts Performance Update process. There is a “System Manager” “System Preferences” flag that can be used to have the part primary supplier always reset to the supplier of the last receipt of the part.
Lead time
This is the lead time in active work or make days.
The number of working days between ordering the Part and receiving it into stock. This should include all the time necessary to process the order and receipt on the system. Days are working days, that are active in the Buy or Make calendar. If the Part has a process route, the Lead time is calculated from the sum of the Operation Lead Times, but it can also be edited in Parts master maintenance. For Parts that have no Process Route there are extensive facilities within the Global Changes for selective mass-changes of Part lead times. The facility auto-calculates lead time from process route times, works and/or purchase history.
Minimum order qty
This is the standard order quantity that MRP will suggest, rounded-up by the Lot Size. MRP may suggest more, if, at the time in question, the resultant stock quantity will be below the Re-Order Level. However, MRP will never suggest an order quantity of less than the Minimum Order Quantity. A Minimum Order Level of zero will result in MRP suggesting orders that exactly meet demand on a Just-In-Time basis. Within Product Costing, the Minimum Order Quantity is used in the calculation of the component of cost attributable to Work Centre Setup Time. If the Minimum Order Quantity is less than 2 the Setup Time cost is applied in full to the Part cost.
Re-order level
The quantity below which MRP will recommend re-ordering. It is, in effect, a trigger quantity which will cause an order recommendation. Therefore, MRP, given a sufficient period of forecasting and reasonable other planning values, will seek to finish the forecast period with the inventory quantity at the Re-Order Level. It is important to choose this value with care. Excessively high Re-Order Levels will have significant stock value implications. The Re-Order Level must be greater than or equal to the Minimum Stock Level. See the MRP Menu topic for a discussion on the significance of this planning value.
Lot size
The value entered here, if greater than zero, is used to round the recommended order quantity. When entering the quantity in a Work Order any Lot Size will be used to round the order quantity, unless, when you leave the quantity entry field, you hold the Option key down. For example, with a Minimum order quantity of 100 and a Lot Size of 25, MRP will recommend orders of either 100, 125, 150, 175, . . . , depending on demand.
Minimum level
The quantity of the Part that should always remain in stock at any time. MRP plans to receive stock from orders in sufficient time to prevent the predicted stock quantity falling below Minimum Stock. The Minimum Stock quantity must be less than, or equal to, the Re-Order Level. See the MRP Menu topic for a discussion on the significance of this planning value.
Yield
The units are either percent rate or units of loss which is controlled by the system preference MCDYIEU. See also the System Preferences window.
Yield as percent rate
Yield rate is a value in percent to 2 places of decimal that can optionally influence costing and MRP recommended demand. It is the percentage of an ordered quantity that will be, on average, received into stock. It does not affect Purchase or Work Order processing in any way. The normal rate is 100.00% and with this rate it has no effect on costing or planning.
For a non-normal yield to influence costing the appropriate System Preferences must be set. For a purchased part, the cost of the part will be calculated as the actual cost divided by the yield rate. This has the effect of uplifting the cost and can be seen as taking into account losses in the transport, quality inspection or other receiving processes.
For parts with a BoM that are manufactured or outwork assemblies, the yield will similarly uplift the cost in assuming that only the yield rate of finished part will be subsequent useful inventory, even though the full kit quantity and process cost was consumed.
For a non-normal yield to influence MRP Scheduling the appropriate setting must be set on the MRP Processing window.
MRP will use the Yield Rate of less than 100% to recommend ordering more of the part than is subsequently received into inventory. For a purchased item this is straight forward. For an item with a BoM, the ordered quantity of components will be assumed to be consumed.
Yield as units of loss per batch
Yield units of lost to 2 places of decimal that can optionally influence costing and MRP recommended demand. It is the number of stock units that will be, on average, lost when a batch of any size is received into stock. It does not affect Purchase or Work Order processing in any way. The normal is 0.00 and with this value there is no effect on costing or planning.
For a non-normal yield to have an effect on costing the appropriate System Preferences must be set. For a purchased part, the cost of the part will be calculated as the actual cost of a re-order quantity batch distributed across the re-order quantity less the number of yields loss units. This has the effect of uplifting the cost and can be seen as taking into account losses in the transport, quality inspection or other receiving processes.
For parts with a BoM that are manufactured or outwork assemblies, the yield will similarly uplift the cost in assuming that re-order quantity less yield loss units of finished part will be subsequently useful inventory, even though the full kit quantity and process cost was consumed.
For a non-normal yield to influence MRP Scheduling the appropriate setting must be set on the MRP Processing window. For example, with yield units of loss set to 1, tea for 2 would be 3 cups, tea for 10 would be 11 and tea for 100 would be 101.
MRP will use the Yield loss of more than 0.00 to recommend ordering more of the part than is subsequently received into inventory. For a purchased item this is straight forward. For an item with a BoM, the ordered quantity of components will be assumed to be consumed.
Planning alias
Here you can enter another pre-defined Part number as an Alias for planning and forecasting purposes. You must enter the exact part number, not just the initial few characters. Planning Aliases are used in the program as follows:
When you enter a Sales Order line-item quantity (with the appropriate “System Manager” “System Preferences” control checked), a review of inventory will be made for the Alias rather than the actual part, if one exists. This is particularly useful when the item being sold is not the inventory-critical item. For example, you may sell a custom tested and packaged assembly. The testing and packaging are customer specific and only carried out after receiving a confirmed Sales Order. However, the assembly is normally stocked, so this part is the one of interest at order time and therefore should be an Alias.
When you use the “Sales Order” “Part Available-to-Sell” analysis function, and you choose a part for analysis that has an Alias, the available-to-sell includes the availability of the Part and its Alias and any other demand from other parts that also have the same Alias. This enables you to review sales for a part that belongs to a family of similar parts. See Sales Orders for a more detailed explanation.
In “Production Plan” forecasting, you can generate a netted production plan for a forecast of sales. In a similar manner to 2 above, you can forecast for an Alias part (i.e. one that is called by several other parts as an Planning Alias). In this case, the direct demand, against which the forecast is compared, will be drawn from the Part, and all parts that have the part as an Alias. This enables you to forecast by product family, rather than specific product. See Production Plan for a more detailed explanation.
By-product part
Here is the By-product part number and description
Shelf life
This is the shelf life in days before expiry.
Default SO items to be ignored in MRP demand tick box
Default to ignore sales as demand in MRP. {PTMFILE.PTMSMRP boolean}
If set, the part will, by default, be marked on a Sales Order item to be ignored in MRP demand. This characteristic can then be changed in Sales Order line-item maintenance. You can use this attribute to eliminate certain products or product groups from control by Materials Requirement Planning. However, you should bear in mind that if the part is an assembly, MRP will not schedule any requirements for it. The consequences of this must be understood in advance as they could be somewhat damaging to your supply situation.
Stock rotations
Stock rotation turns per year.
For supplies of the part MRP will order PO Kits tick box
When a component of a PO Kit, MRP will plan to purchase the parent kit. {PTMFILE.PTMPOKL boolean}
This attribute of a part is only useful when the part is a component in a BoM where the parent is a phantom type and has a purchase part record. If this attribute is then checked, any demand for the part will be assumed to be met from purchasing its parent kit. For the full implications to MRP see the Treatment of Purchase Order Kits section in the MRP Menu topic.
Purchase users
This is a comma separated list of user ids permitted to add this part to a purchase order.
Product Serial Numbering Options field
Serial number required (sum of: 1=dispatch and job issue, 2=WO receipt, 4=WO kit issue, 8=Goods receipt). {PTMFILE.PTMSNO integer shortint}
You can control when the user is able to assign a serial number to a part. Check one or more options if the part is to be serial numbered on Goods Receipt, WO kit issue, WO receipt and/or Dispatch or Job issue. If the “System Preference” is set and the Dispatch or Job issue is checked, it will be mandatory for the part to be assigned serial numbers. See the topic Product Serial Numbering for details.
Tracking on dispatch tick box
Create SN Tracking record on dispatch or job issue. {PTMFILE.PTMSNT boolean}
If set, a Serial Number Tracking record will be automatically created for each serial number assigned to the dispatch or job issue. It has no value if set when the Required-on Dispatch and Job issue option is not set. See the Serial Number Tracking Maintenance window for details of serial number tracking.
Default SO items to be ignored in MRP Demand
Default to ignore sales as demand in MRP. {PTMFILE.PTMSMRP boolean}
If set, the part will, by default, be marked on a Sales Order item to be ignored in MRP demand. This characteristic can then be changed in Sales Order line-item maintenance. You can use this attribute to eliminate certain products or product groups from control by Materials Requirement Planning. However, you should bear in mind that if the part is an assembly, MRP will not schedule any requirements for it. The consequences of this must be understood in advance as they could be somewhat damaging to your supply situation.
For supplies of the part MRP will order PO Kits
When a component of a PO Kit, MRP will plan to purchase the parent kit. {PTMFILE.PTMPOKL boolean}
This attribute of a part is only useful when the part is a component in a BoM where the parent is a phantom type and has a purchase part record. If this attribute is then checked, any demand for the part will be assumed to be met from purchasing its parent kit. For the full implications to MRP see the Treatment of Purchase Order Kits section in the MRP Menu topic.
Assembly By-product Treatment
The program has the ability to handle single by-products in assembly manufacture. The by-product is identified in the parent’s part record and the quantity produced and cost implications are calculated from the parent and BoM mass values. The system is most useful in instances such as accounting for swarf.
For an assembly to produce a by-product during Work Order receipt, the following settings need to be made:
The “Use automatic by-product recording and costing” System Preference must be checked.
The By-product must be defined as a part. Its mass must be set to its correct mass for the stock unit of measure you give it. Its cost needs to be set to its stock unit value you can achieve if you re-use or sell the by-product.
The Assembly part record must have the by-product part number entered in the By-product field.
The Assembly part record must have its mass entered so that the correct quantity of by-product can be calculated (see below).
All component parts in the bill of material for the assembly must have their masses entered so that the correct quantity of by-product can be calculated (see below).
Calculating by-product quantity
The quantity of by-product produced is calculated from the difference in mass between the parent part and the sum of components used in the BoM, as follows:
BoM Mass = Sum (Component BoM quantity * Component Mass)
By-product Quantity in stock UoM = (BoM Mass – Parent Mass) / By-product Mass
This will be the by-product quantity per stock unit of measure of the assembly part.
How the by-product effects assembly cost
The cost saving to the assembly of production of the by-product will be the value of the quantity of by-product produced. This cost will be a negative element of cost and is posted to the Receiving Overhead cost element of the assembly part as a negative number.
If you are using Receiving Overhead (I.E Have a non-zero receiving overhead rate for manufactured items set in the Company Details.) the receiving overhead element will show the receiving overhead less the by-product value.
How the by-product inventory is affected
If you have set up an assembly correctly for a by-product, the quantity of by-product produced will be automatically accounted for at the time of Work Order completion. A stock movement history record for the by-product part will be made of type F = General Return to Stores.
STORAGE TAB
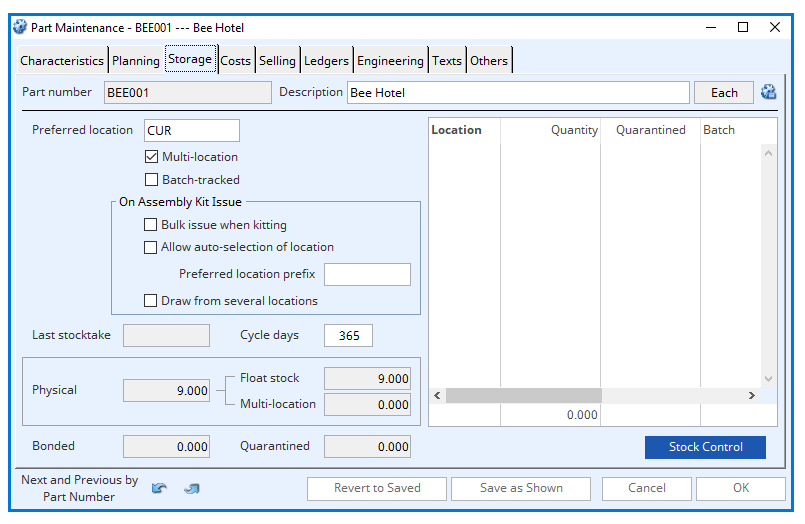
Preferred Location
Stores single or preferred location. {PTMFILE.PTMSLOC char 8}
This is an optional field for providing a location code to define where the Part is stored. Kitting and dispatch Picking Lists are provided in Location sequence and many reports can be optionally sorted by Location. If the Multi-location flag is set, the data in Location will be the default for any multi-location created and it is then known as a Preferred Location. Otherwise, it is a Single Location.
Multi-location
Multi stock location indicator. {PTMFILE.PTMMLOC boolean}
This is a flag that determines whether the part is permitted to have, and processed for, multiple stores locations. If checked, the part will be permitted to have multiple locations including quarantined locations. If, it is also Tracked, it will have to have these multiple location records to identify batch numbers. During processing, the system will assume that a Multi-location flagged part requires location selection for each inventory movement. See the Inventory section for more details.
Batch-tracked
Tracked (this part traced with batch tracking). {PTMFILE.PTMTRAC boolean}
This is a flag that determines whether the part will be subject to batch tracking. If checked, you will also force the part to have the Multi-location flag to be turned on. This, in effect, tells the system to record tracking information every time an inventory movement takes place. For full traceability all higher assemblies of a part need also to have their Batch-Tracked Flag turned on. You are left to set which parts you want tracked. See the Inventory section for more details.
On Assembly Kit Issue field
Bulk issue when kitting
Bulk issue flag. {PTMFILE.PTMBULK boolean}
A flag that identifies, if checked, that this Part is never kitted to a Work Order. Bulk Issue Parts are only issued directly to production as a float of bulk unaccounted production stock. However, MRP does calculate demand for the Part. This enables manufactured parts to be Bulk Issue at a later stage in production. Care should be taken in placing orders for Bulk Issue parts based on MRP recommendations as MRP has no knowledge of the stock being held in the production area. If this flag is un-checked, the Part is kitted to Work Orders. You have the option with Backflushed Work Orders to account for Bulk Issue parts (Take care not to account for them twice!).
Allow auto-selection of location
Allow auto-selection of location on kit issue. {PTMFILE.PTMASTO boolean}
During assembly kit issue this controls whether the system automatically assigns multi-locations for the component issues. If the part has no locations, auto-selection will not be possible. The system’s selection can be amended and must subsequently be confirmed by the user. See also the Assembly auto-selection preferred location prefix field. Auto selection only applies during Work Order kit issue functions.
Preferred location prefix
Assembly auto-selection preferred location. {PTMFILE.PTMASLO char 8}
This value is only used by the system if the part is an assembly with some components which are multi-location and have the Allow auto-selection of location attribute set. When auto-selection takes place, the process will only choose from those locations that start with the code characters entered here for the assembly part.
Draw from several locations
Draw from several locations (always No for tracked parts). {PTMFILE.PTMMSTO boolean}
For multi-location or tracked parts, this control determines whether you are able to draw any issue quantity from more than one location. If set, it enables you to split an issue between several locations. Tracking is maintained if the part is set for Batch-Tracking. The control only has a value when the part is also set for Multi-location and/or Batch Tracked. If it is also set for auto-selection the system will create split batches if appropriate.
Last stocktake
This is the last stocktake freeze date
Cycle days
The stocktake cycle in days (set to zero for not cycled)
Physical
This is the inventory physical quantity.
Float stock
Float stock is the difference between physical stock and non-quarantined multi-location stock and should always be zero for tracked parts.
Multi-location
A list of all store locations for the part. Drag and drop to set preferred location. Double-click to view Non-Conformance Reports for part and/or batch.
Bonded
The total quantity of bonded stock.
Quarantined
The total quantity of quarantined stock.
Stock Control button
Selecting the stock control button will open the Stock Control Activities window.
Stock location table
If a part has a multi-location, all locations will show in this table.
Open Extended List button
Selecting this button will open the Stock Location Listings window.
COSTS TAB
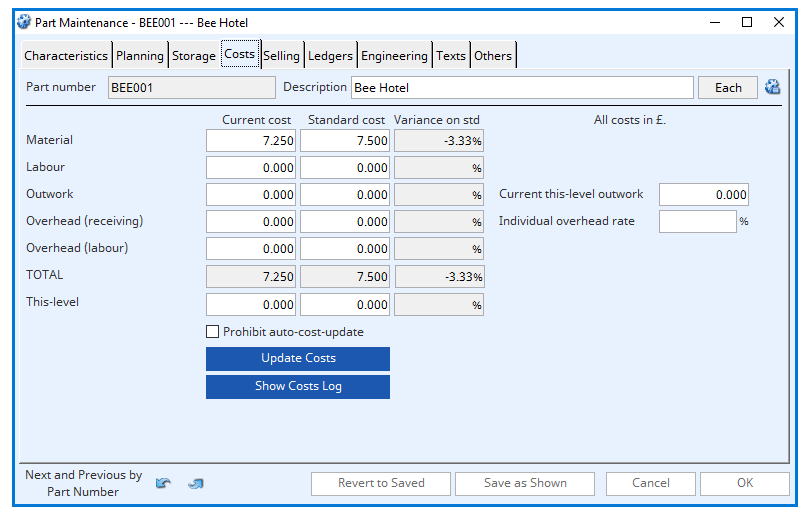
Current Costs
Both Current and Standard Part costs are recorded within the system for each part in five elements (6 if you include this-level). Current Costs for assemblies can be calculated for an individual part with the Update Costs button option in Parts, BoM or Process Route maintenance or the “Log WO Performance” function. In the “Product Costing” you can “Roll-up current costs” for a range of parts. Costs can be entered in the Parts master window but will be overridden during automatic updating unless flagged.
Standard Costs
Standard Costs are held in Material, Labour, Outwork, Overhead, Receiving Overhead and This-level fields. Standard Costs are taken from the Current Cost fields during the “Roll-Over Current-to-Standard Costs” routine within the Product Costing functions, typically at a financial year-end. Costs can be entered in the Parts master maintenance window but will be overridden during Roll-Over. A column of Variance to Standard Costs is provided for review purposes. This is calculated as follows: (Cur. Cost – Std. Cost) divided by Std. Cost, expressed as a percent. If there is no standard cost, the variance will be zero.
Current Material Costs
Current material cost. {PTMFILE.PTMCMC number 3dp}
Material cost is the purchase cost of a purchased Part (calculated from purchase history), or the accumulated purchased costs of components that make up an assembly down to the lowest level.
Standard Material Cost
The standard material cost.
Variance on Standard Material Cost
The % variance between the current cost and the standard cost for the part.
Current Labour Cost
Current labour cost. {PTMFILE.PTMCLC number 3dp}
Labour cost is the accumulated Labour costs of an assembly and any sub-assemblies calculated from their Process Routes and Work Centres.
Standard Labour Cost
The standard labour cost.
Variance on Standard Labour Cost
The actual mark-up that the selling price represents to the total standard cost for the part.
Current Outwork Cost
Current outwork cost. {PTMFILE.PTMCOC number 3dp}
Outwork cost is the accumulated Outwork costs of an assembly and any sub-assemblies. That is, the charges made by a supplier for both Outwork Assemblies and for any process route Outwork Operations.
Standard Outwork Cost
The standard outwork cost.
Variance on Standard Outwork Cost
The actual mark-up that the selling price represents to the total standard cost for the part.
Current this-level outwork
The current this-level outwork costs
Current Overhead (receiving) Cost
Current receiving overhead cost. {PTMFILE.PTMCROC number 3dp}
Receiving Overhead cost is either a Goods (PO) receiving overhead (burden) charge or a Work Order receiving (completion) overhead charge, depending on whether the part is subject to purchase or manufacture through a WO. In the case of a purchased part, the amount is calculated from the Goods received overhead rate (set in the “System Manager” “Company Details”) times the cost. In the case of an assembly, the amount is calculated from the WO received overhead rate times the “This-level cost” of the assembly (it is not applied to rolled-up sub-assembly costs). The receiving overhead is rolled up into the material cost element of any higher assemblies. In either case the default receiving rate can be overridden by the Individual Overhead Rate.
Standard Overhead (receiving) Cost
The standard overhead receiving cost.
Variance on Standard Overhead (receiving) Cost
The actual mark-up that the selling price represents to the total standard cost for the part.
Individual overhead rate %
Individual receiving overhead percent rate (if zero default is applied, if -ve no rate is applied). {PTMFILE.PTMROVR number 2dpShortnum}
If a part’s individual receiving overhead rate is zero, when cost updates are performed the “System Manager” “Company Details” default receiving overhead rates (MCDPOOV and MCDWOOV) will apply. If this individual rate is set negative, a receiving rate of zero will be applied. If the rate is positive, that rate will apply when calculating receiving overhead, regardless of the system manager defaults.
Current Overhead (labour) Cost
Current overhead (Labour) cost. {PTMFILE.PTMCOVC number 3dp}
Labour Overhead cost is the accumulated Overhead costs of an assembly and any sub-assemblies calculated from their Process Routes and Work Centre Overhead rates.
Standard Overhead (labour) Cost
The standard overhead (labour) cost
Variance on Standard Overhead (labour) Cost
The actual mark-up that the selling price represents to the total standard cost for the part.
Total Current Cost
The total current cost for the part, being the sum of the constituent components of current cost.
Total Standard Cost
The total standard cost for the part, being made up from the sum of the constituent standard costs.
Variance on Standard Total Cost
The % variance between the current cost total and the standard cost total for the part.
This Level Current Cost
Current this-level cost. {PTMFILE.PTMCTLC number 3dp}
This-level cost is the sum of the Labour, Overhead and Outwork costs incurred in making the assembly plus the material cost of purchased items in the part’s immediate (single-level) BoM. It excludes all accumulated costs of sub-assemblies. This represents the added cost in making the assembly over the cost of its sub-assemblies. It is always the same as the Total cost for purchased parts and assemblies containing no sub-assemblies. It is used in ABC Analysis and to calculate receiving overheads.
This Level Standard Cost
The standard this-level cost.
Variance on Standard This Level Cost
The actual mark-up that the selling price represents to the total standard cost for the part.
Prohibit auto-cost-update tick box
Cost update prohibited. {PTMFILE.PTMNOCO boolean}
This flag, if set, will prevent any Current Cost update taking place for the part during Product Costing functions. See the Product Costing window for more details.
Update Costs button
To carry out a single-level roll-up cost analysis for the part. The cost analysis is based upon the current BoM and Process Route with the current Work Centre rates applying. It opens the Part Costs Update window.
Show Costs Log button
To view the current costs log (if the system preference makes it available). It opens the Part Costs History Log Listing window.
SELLING TAB
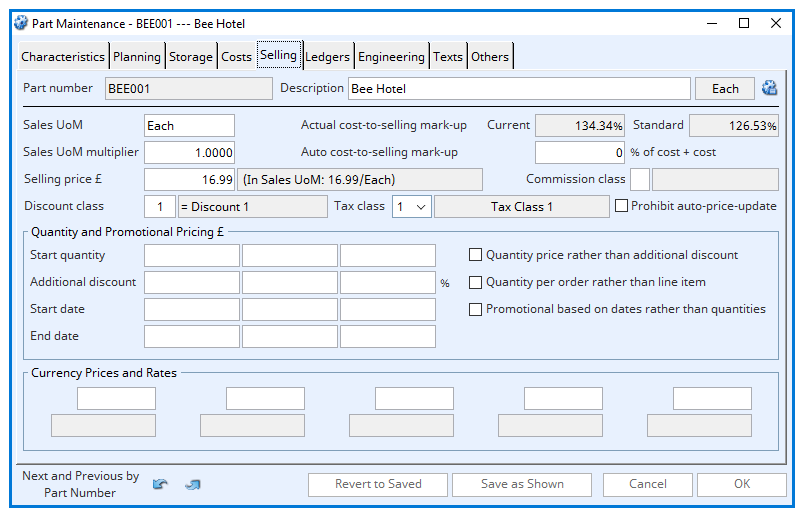
Sales UoM
Sales unit of measure. {PTMFILE.PTMSAUM char 6}
This is a unit of measure descriptive field that represents a default alternative Sales Order unit of measure in which the Part is sold. E.G. “Pk 100”, “Box 5” (Box of 5), etc. The default is the Stock UoM. Sales UoM only occur physically when dispatched to a customer, never in the stores or in the production environment.
Actual cost-to-selling mark-up – Current
The actual mark-up that the selling price represents above the current cost.
The Selling price mark-up or gross margin (depending on system preference) is shown for Current Cost and Standard Cost. Mark-up is expressed as the percent of Cost over the Cost that the Selling price has been set at. The Selling Mark-up is calculated as (Selling Price-Cost) divided by Cost, expressed as a percent. If you are using Gross Margin, the calculation is (Sales Price – Cost) divided Sales Price. See the Product Costing window for more details.
Actual cost-to-selling mark-up – Standard
The actual mark-up that the selling price represents to the total standard cost for the part
Sales UoM multiplier
Sales order Unit of Measure Multiplier. {PTMFILE.PTMMULTI number 4dp}
A multiplier that when applied to the Stock UoM yields the Sales UoM for the Part. Up to 4 decimal places are provided. For example, if the Stock UoM is “Each” and the Sales UoM is “Pk 100” then 100.0000 must be entered in the Conversion Multiplier. The default is 1.0000. If the Stock UoM is identical to the Sales UoM the multiplier is forced to 1.0000.
Auto cost-to-selling mark-up – % of cost + cost
Margin of sales price over cost price. {PTMFILE.PTMARGN number 0dpShortnum}
This field can be used to automatically generate the Selling Price by applying the percent mark-up or gross margin to either the Total Current or Standard Cost for the Part. This is done during the “Generate selling price” routine run from the Product Costing feature. You have a “System Preferences” choice of Mark-up or Gross Margin. For Mark-up, the routine makes the Selling Price = Total Cost * (100 + Auto price mark-up) / 100. For Gross Margin, the routine makes the Selling Price = Total Cost * 100 divided by (100 – Gross Margin) where Gross margin cannot be greater than 99%. In Product Costing functions the standard cost is used, while the Update Costs function uses current costs.
Selling Price
Selling price. {PTMFILE.PTMSELL number 2dp}
The Part selling price and customer-specific discounts can, by default, be applied on a Sales Order. The Selling Price value can be entered on the maintenance window, or it can be automatically generated from the Standard Cost and the Automatic cost to selling price mark-up or gross margin. This is achieved within the Product Costing feature. See the Product Costing window for more details.
Firstly, you must set the option optSOPrices3Decimals to 1 or more. See Program Options Listing window for details.
Within OpenVision you need to change the following table columns to 3dp numbers in the Schema classes:
scCPTFILE: CPTPR01, CPTPR02, CPTPR03, CPTPR04
scPTMFILE: PTMSELL, PTMCUX1, PTMCUX2, PTMCUX3, PTMCUX4, PTMCUX5, PTMQPD2, PTMQPD3, PTMQPD4
scSAHFILE: SAHPSUM
scSOLFILE: SOLPRIC
Copy the classes from OpenVision into Caliach Vision:
scCPTFILE, scPTMFILE, scSAHFILE, scSOLFILE
Selling Price in Sales Units
The selling price of the selling unit of measure of the part.
Commission Class
Commission class (for choice of commission agent applicability on Job and SO part items). {PTMFILE.PTMCOML char 1} See the Commissioned Sales Agents Maintenance window for full details of the commission handling system.
Discount Class
Discount class. {PTMFILE.PTMDISC integer shortint}
A number from 0 to 20 that defines one of the 21 levels of discount that is, by default, applied to this Part when entered at a Sales Order line item. The description for each of the 20 non-zero classes is maintained in the File — System Manager, Company Details Maintenance window, Descriptions tab pane. Each customer is assigned a percent discount for each class from 1 to 20. When a Sales Order is prepared for a Part the customer discount rate is applied for the class appropriate to the Part ordered. A 0 class always applies a zero-discount rate for the part.
Discount Class Description
The discount class descriptor, as set in the manager company details.
Tax Class
Sales tax class. {PTMFILE.PTMTAXC char 1}
See the Tax Maintenance window for full details of the tax handling system.
Prohibit auto-price-updates
Price update prohibited. {PTMFILE.PTMNOPR boolean}
This flag, if set, will prevent any Sales Price changes taking place during Product Costing functions. See the Product Costing window for more details.
Quantity and Promotional Pricing UK £ Field
Start quantity fields
2nd price start quantity in Stock UoM. {PTMFILE.PTMQT02 number 3dp}
Use these three fields to designate the quantities at, and above, which quantity discounts or prices will apply. The normal selling price applies for all quantities below the first start quantity, etc.. All quantities entered must be progressive. i.e. the next quantity must be greater. You can terminate the extent of quantity pricing by zeroing the quantity values above which they are applicable.
Quantity price rather than additional discount tick box
Quantity Price rather than additional discount. {PTMFILE.PTMQPRI boolean}
You can supplement the normal sales price and customer discount structure with quantity-based additional discounts or prices. This flag controls whether the quantity supplement is a discount or a substitute price. If you check this option, the value you enter for the quantity prices will be applied to SO line items for this part. Otherwise, any values entered will be applied as additional discount rates for the part.
Additional discount fields
2nd quantity additional discount or price. {PTMFILE.PTMQPD2 number 2dp}
These fields are available to enter additional discounts or prices applicable for the quantities specified, depending on the Apply price rather than additional discount rate option chosen. Prices must be entered for all start quantities that are non-zero. Prices are entered in normal currency and for a stock unit of measure.
Quantity per order rather than line items tick box
Quantity prices per sales order rather than order line item. {PTMFILE.PTMQPPO boolean}
Start date fields
Promotional price start dates. {PTMFILE.PTMPD1S date date1980}
Promotional based on dates rather than quantities tick box
Promotional prices or additional discounts based on dates rather than quantities. {PTMFILE.PTMPDAT boolean}
Promotional pricing or additional discounts are applied when a sales order or job item is entered for dispatch or issue within a date range. The dates are inclusive. If there is no start date, the end date is a limit for the price or additional discount. If there is no end date, the price or additional discount applies from the start date thereafter. If there are no dates for the price or additional discount it will never apply. If two or more date ranges overlap, the lowest price or greatest additional discount will be applied. Customer Parts have similar controls that override part settings.
End date fields
Promotional price end dates. {PTMFILE.PTMPD1E date date1980}
Currency Prices and Rates fields
Sales Price in currency. {PTMFILE.PTMCUX1 number 2dp}
With the calculated exchange rate of the Currency Price to the current local currency Sales Price.
Sales Pricing Logic
Sales Order Item prices and discounts applied under different conditions are as follows:
When there is NO Customer-Part record matching the SO customer and line-item part:
Condition | SO Item Price | SO Item Discount |
A: Local currency No part quantity prices | Part’s selling price | Customer discount for the part’s discount type |
B: Foreign currency No currency price No part quantity prices | Part’s selling price times the Sales Order currency exchange rate | As A above |
C: Foreign currency Currency price No part quantity prices | Part’s currency selling price | As A above |
D: Local currency Quantity additional discounts | Part’s selling price | Customer discount for the part’s discount type plus the part additional discount for the item stock UoM quantity or the promotional dispatch date |
E: Foreign currency No currency price Quantity additional discounts | Part’s selling price times the Sales Order currency exchange rate | As D above |
F: Foreign currency Currency price Quantity additional discounts | Part’s currency selling price | As D above |
G: Local currency Part quantity prices | Part’s price for the item stock UoM quantity or the promotional dispatch date | Customer discount for the part’s discount type |
H: Foreign currency No currency price Part quantity prices | Part’s price for the item stock UoM quantity times the Sales Order currency exchange rate | As G above |
I: Foreign currency Currency price Part quantity prices | Part’s currency selling price ignoring any quantity prices | As G above |
When there IS a Customer-Part record matching the SO customer and line item part:
Condition | SO item Price | SO item Discount |
J: SO in local currency Additional discounts in Cust.-Part record | Part’s selling price | Customer discount for the part’s discount type plus the Cust.-Part additional discount for the item stock UoM quantity or the promotional dispatch date |
K: SO in foreign currency No part record currency price Additional discounts in Cust.-Part record | Part’s selling price times the Sales Order currency exchange rate | As J above |
L: SO in foreign currency Part record currency price Additional discounts in Cust.-Part record | Part’s currency selling price | As J above |
M: SO equals Cust.-Part currency Quantity prices in Cust.-Part record | Cust.-Part selling price in SO currency for the item stock UoM quantity or the promotional dispatch date | Customer discount for the part’s discount type |
N: SO NOT equals Cust.-Part currency Quantity prices in Cust.-Part record (only descriptive data from Cust.-Part record applies) | As A to I above | As A to I above |
LEDGERS TAB
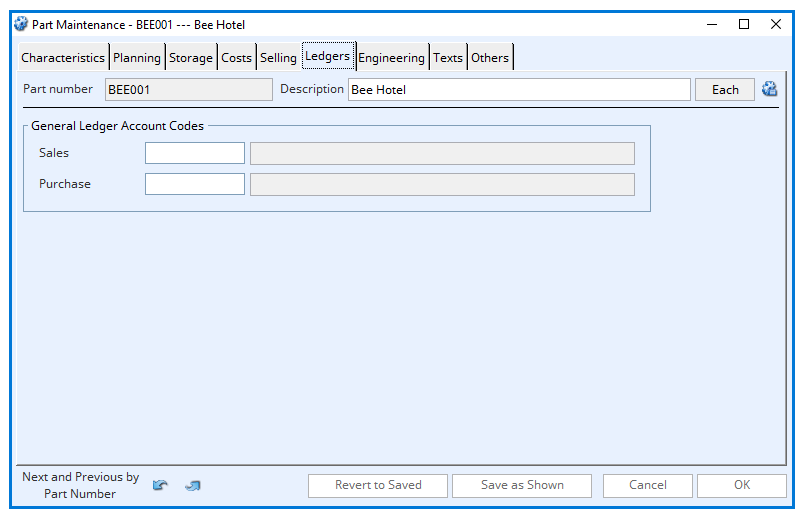
General Ledger Account Codes
Sales
Sales G/L account code. {PTMFILE.PTMACCO char 10}
This field is provided for integration with the Ledgers option of Caliach Vision. It can be used for grouping parts for Stock Valuation purposes. If the application is not licensed with the Ledgers option, any 10 character code can be entered. If the Ledgers menu is installed, only valid sales type General Ledger accounts can be entered in this field. If you hold the shift key down when passing out of the account code box, the system will accept a non-Sales type G/L account, otherwise only a ‘S’ type account will be permitted. A Sales Order line item will be given this code by default.
Purchase
Purchase G/L account code. {PTMFILE.PTMPACO char 10}
This field is provided for integration with the Ledgers option of Caliach Vision and as a means of grouping stock and purchase items. If the application is not licensed with the Ledgers option, any 10 character code can be entered. If the Ledgers menu is installed, only valid purchase type General Ledger accounts can be entered in this field. It is useful for Supplier Invoice Verification and subsequent account postings. A Purchase Order line item will be given this code by default.
ENGINEERING TAB
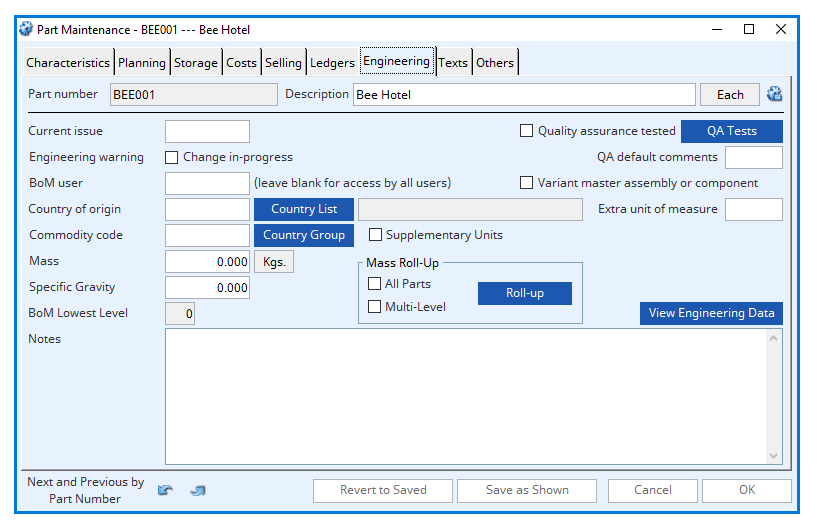
Current Issue
Engineering issue reference. {PTMFILE.PTMISSU char 4}
This field enables you to apply to the part an Engineering Issue reference of up to three upper- or lower-case characters. It can be used to help control engineering change. When a part is used in the following, the parts master Issue is stored in the record by default (but usually can be changed):
a Bill of Material component,
a Job line item,
a Product Serial Number record,
a Purchase Order line item,
a Work Order assembly.
The following history also stores the relevant Issue that applied when the history record was created:
Job item, as it was when the item was completed,
Purchase History, from the PO item on receipt,
Sales History, from the parts master when dispatched,
Work History, from the WO when the history was created.
The “Update Issue…” function on the “Parts” menu enables you to review and update references to the part to which the Issue is relevant. See the Update Part Issue and References window for details.
Quality Assurance Tested tick box
Quality assurance tested (requires entries in QA system). {PTMFILE.PTMQATS boolean}
QA Tests button
Click to open the Quality Assurance testing regime for the part.
QA Default comments
Quality assurance test default comments std. engineering text code. {PTMFILE.PTMQACO char 4}
Engineer Warning (Change in-progress) tick box
Engineering Change in progress flag. {PTMFILE.PTMENGC boolean}
If set, users will be warned that the part is subject to an engineering change when they attempt to use it on a Sales, Purchase or Work Order. The warning message shows any Engineering Notes.
BoM user
BoM assembly maintenance user. {PTMFILE.PTMBOMU char 3}
You can use this field on a BoM parent part to designate a specific individual’s ownership of assembly maintenance. Enter the designated user’s Transaction I.D.. Leaving the field blank will mean that any user with Security Settings permitting them to maintain BoMs will be able to do so. Having confirmed a specific user as the BoM user, no other user will be able to change that designation on the assembly part record. There is a safety exception to this rule, however. If you have Administrator privileges in the security settings, you can amend any BoM user.
Variant master assembly or component tick box
Variant master assembly or component. {PTMFILE.PTMVART boolean}
Country of origin
This is the country of origin
Country List button
This button will open a list of all countries in your database
Country description
The name of the country selected.
Extra unit of measure
Extra unit of measurement. {PTMFILE.PTMXUOM char 6}
Commodity Code
Commodity code. {PTMFILE.PTMCOMC char 12}
This field can contain up to 12 characters of any type. It can be used for any coding purposes and is available for report/function parts selection and sort. It has particular significance if you are wanting to use the “Sales History” or “Purchase History” “Trade Statistics” analysis feature. In this case you should apply your Customs export/import classification codes.
Country Group button
Commodity Codes can vary depending on international trade agreements. For example, the US requires one set of commodity codes for customs, whereas the EU requires a different set. If you need to use country group commodity codes, you must designate each country with a group code in the Country Maintenance window. This button opens the Country Group Commodity Codes window which allows you to maintain non-standard commodity codes for country groups.
Supplementary Units
Supplementary units flag. {PTMFILE.PTMSPLU boolean}
A special yes/no flag (S.U.) used exclusively for “Trade Statistics” reports. If set, the report applies dispatch quantity rather than mass to the report.
Mass
Mass weight for the part. {PTMFILE.PTMMASS number 3dp}
The mass, or weight, of the part. The units of mass you want to use, that will apply throughout the system, is set in the “System Manager” “Company Details” section, normally, “Kgs.” or “Lbs.”. The mass has a resolution of 3 decimal places. You should enter here the mass of a stock unit of measure of purchased parts and raw materials (lowest level BoM items). The Roll-up button is used to have the program calculate the mass of assemblies. Mass is used in “Sales Orders” to indicate the total weight of a SO. It is also used in “Trade Statistics” analysis for purchases and sales history.
Mass Units
Mass units for window/report display. {MCDFILE.MCDMASU char 4}
Specific Gravity
Specific Gravity. {PTMFILE.PTMSG number 3dp}
Specific Gravity value for the part. This is useful for chemical products, however it is not used explicitly within the system so can be used for any value that is needed in custom reports or documents.
BoM Lowest Level
Lowest level number within the BoM. {PTMFILE.PTMLLNO number 0dpShortnum}
This is a system-generated number that indicates the lowest level that the Part exists in the Bills of material structures. If 0 then the Part never exists as a component to an assembly. On the maintenance window, this field is for review only. The automatic calculation of this number can be switched off in File — System Manager — System Preferences but that leads to restrictions. File — Advanced — Reset Data Files Re-organise Bills of Material function is used to re-calculate BoM Lowest Level Numbers.
Notes
Engineering issue notes. {PTMFILE.PTMNOTE char 10000000}
A long text field that is primarily designed for notes relating to Issue history. It can contain any text up to 10,000,000 characters. There are only two places where Notes are used in the system: They are included in the Parts Engineering report. In building a ScratchPad list, you can search for all parts containing a text string in the Notes field
Mass Roll-Up field
All Parts tick box
If unchecked only the selected part will have its mass calculated. If checked all parts will be calculated.
Multi-Level tick box
Only relevant for a single part roll-up. If checked, the mass will be calculated from the lowest level of the BoM structure. Otherwise, the parts immediate BoM is used.
Roll-up button
Click to calculate the Mass from the Bill of Material and Process Route of this or all parts.
The parts master mass of components is added to the Mass-Change of each Process Route operation. Operation mass-change can be either positive, adds mass, or negative, removes it from the sum of the component kit’s mass. The Roll-up button is only active if you have privileges to use the “Update” function on the “Parts” menu.
When you click on the Roll-up button you will be given the choice of rolling-up the currently selected part, or all parts in the system that have components in the BoM file.
If you choose only to roll-up for the currently selected part, you will be offered a further option to either roll up multi-level or just for the immediate single-level.
With a multi-level roll-up, the entire BoM structure below the currently selected part is analysed. However, unlike the All Parts option earlier, the results for each lower assembly are not saved. At the end of the analysis, and if the calculated mass differs from the currently stored mass for the selected part, you will be offered the opportunity to change it.
View Engineering Data button
Click to directly launch engineering data maintenance for the selected part.
TEXTS TAB
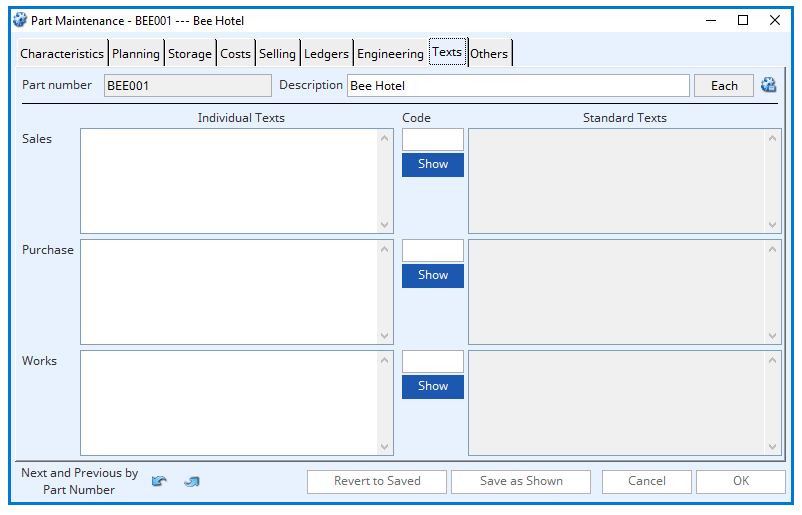
Parts can have Individual and Standard text applied separately to them for Sales Orders, Purchase Orders and Work Orders. Any standard text applied to a part must be pre-defined. Show buttons are available to give you lists of available alternatives for the standard texts. During edit, you can double-click on a list line to apply that text to the part.
Sales Individual Text
Special sales text. {PTMFILE.PTMSATX char 10000000}
Sales Standard Text Code
Sales std. text code. {PTMFILE.PTMTXS char 4}
Show button
Click this button to display a list of alternatives for the field alongside the button. Double-clicking on a list line will enter the value from the list.
Sales Standard Text
Standard Sales Text of up to 10000000 characters
Text list
A list of all available Sales standard texts. Double-click on a text line to assign this text for the part.
Purchase Individual Text
Special Purchase Text of up to 10000000 characters
Purchase Standard Text Code
Purchasing standard text code. {PTMFILE.PTMTXP char 4}
Show button
Click this button to display a list of alternatives for the field alongside the button. Double-clicking on a list line will enter the value from the list.
Purchase Standard Text
Standard Purchase Text of up to 10000000 characters
Text list
A list of all available Purchase standard texts. Double-click on a text line to assign this text for the part.
Works Individual Text
Special Work Text of up to 10000000 characters
Work Standard Text Code
Works std. text code. {PTMFILE.PTMTXW char 4}
Show button
Click this button to display a list of alternatives for the field alongside the button. Double-clicking on a list line will enter the value from the list.
Works Standard Text
Standard Work Text of up to 10000000 characters
Text List
A list of all available Works standard texts. Double-click on a text line to assign this text for the part.
Use of Engineering data records on Purchase, Sales and Work Orders and Jobs
You can use Engineering Data records to add additional detailed information for a particular Part to line items in Purchase and Sales Orders and to the header of Work Orders. This is a special feature that is instigated for each Part by adding a special text string to the beginning of the Part’s Individual Purchase, Sales and/or Work Texts respectively.
The string must be in the form EDX-NNN…..N! and is case-sensitive. ED stands for Engineering Data and is mandatory, X can be T for Engineering Texts only, G for Engineering Graphic only or A for All engineering data. The – is mandatory. NNN…..N is the Document Number for the engineering data record you wish to have added to the Order. The trailing ! is mandatory.
The Individual Text for the part will still print as normal on the Order, but without the special code string above, if an appropriate Engineering data record is found for it.
OTHERS TAB
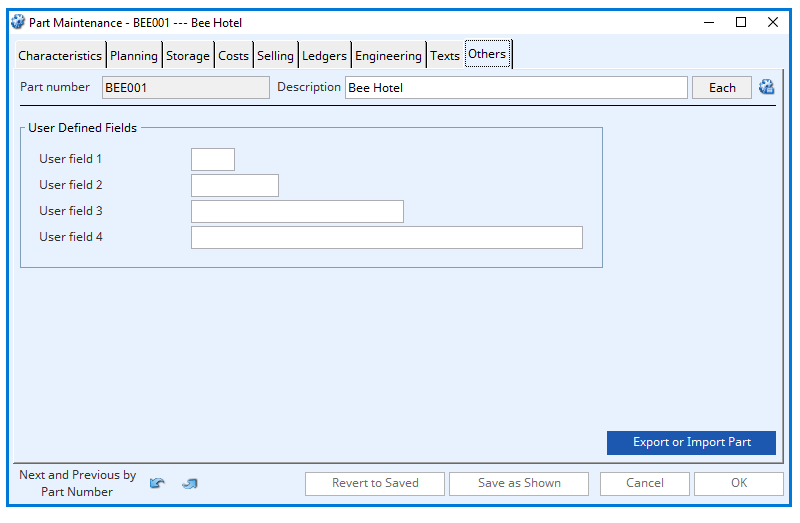
User Defined Fields
These fields are available for any use you wish to put them. They are not used or reported by the system and are provided for use with custom searches or reports or Ad Hoc reports. There are 4-character fields that are limited to 1, 4, 18, and 30 characters respectively. These fields can be set in Global Changes. The field descriptions are set in File — System Manager — Company Details Maintenance window Descriptions tab pane.
Export or Import Part button
This button opens the PartMaster and Related Export and Import window in which you can export a part and its related master records or import from an export file from another datafile.
BUTTONS AND FIELDS
Revert to Saved button
Selecting this button will revert any changes to the previously saved version.
Save as shown button
This button will save the changes you have made to the data file.
Cancel button
Selecting this button will abort the process currently in session.
OK button
This button updates the data you have entered or confirms the selection and/or processes the function you have called.
Compiled in Program Version 6.00. Help date last modified on 14 June 2022
Class wPtmEdit last modified 25 May 2022