Caliach ERP Tutorial
This tutorial is designed for those who are completely new to Caliach Vision ERP and want to know how to use the free Demonstration Software.
Processing Activities
- Create a Sales Order
- Adding Line Items
- Printing the Sales Order
- Dispatching the Sales Order
- Printing the Invoice
- Review History
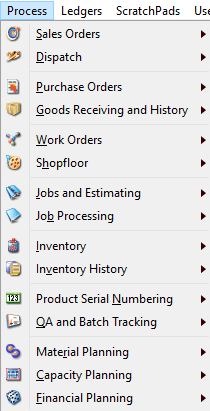
All day-to-day activities of a normal business are carried out under the Process menu other than accounting which is carried out under the Ledgers menu.
Offers or contracts to customers are prepared under Sales Orders and these are shipped out under Dispatch.
Raw materials, components and other supplies are ordered on suppliers using Purchase Orders and when they arrive that is recorded in Goods Receiving.
Production is managed through Work Orders and details of activity carried out can be recorded in Shopfloor.
Jobs and Estimating are hybrid sales and works orders when parts and work activity can co-exist on a document that forms the basis of a customer contract and production order. Job Processing is the recording of activity carried out on Jobs.
General purpose stock management activities are recorded in Inventory and stock movements can be viewed in Inventory History.
A full multi-level Product Serial Numbering System enables you to record and track equipment in production and shipped to customers.
The results of Quality testing and Batch Tracking are available where you have applied such options to parts.
Material Planning (Forecasting, Planning and MRP), Capacity Planning and Financial Planning provide full regenerative MRP, Infinite Capacity Planning and Financial consequence reviews.
It is beyond the scope of this tutorial to cover all these areas in detail although some are covered in greater depth later. We will limit ourselves to Sales Order activity which should provide you with enough experience to explore other areas of Process menu functionality yourself.
Create a Sales Order
Quotations are unconfirmed Sales Orders and both can be created using the Sales Order hierarchical menu. Operate the New Order or Quote menu item to open the Sales Order Maintenance window ? and on top of that the Customer Selection dialogue ?.
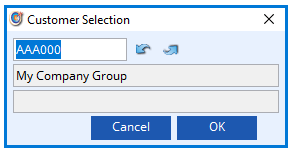
You can use a number of techniques to find the customer you want. You can enter a code, or the initial characters of a code and then use the up and down arrow buttons to target into the customer you want. You can use the Customer ScratchPad by clicking on a line or using drag-and-drop or you can use Keyword Search. For this exercise, just type A and press the tab key which will select AAA000 – the new customer you created earlier. If the customer had credit restrictions, this would show below the company name. Click on the OK button or press the Enter key to confirm your selection.
You will now be left with the Sales Order Maintenance window populated with your selected customer and all defaults associated with that customer such as currency and payment terms. You will notice that the window has “Quotation: NEW to …” in its heading. This is because the user SYS has Quotation as the default setting however we can immediately change it into a Sales Order by checking the Confirmed as Sales Order checkbox which is just below the customer name field.
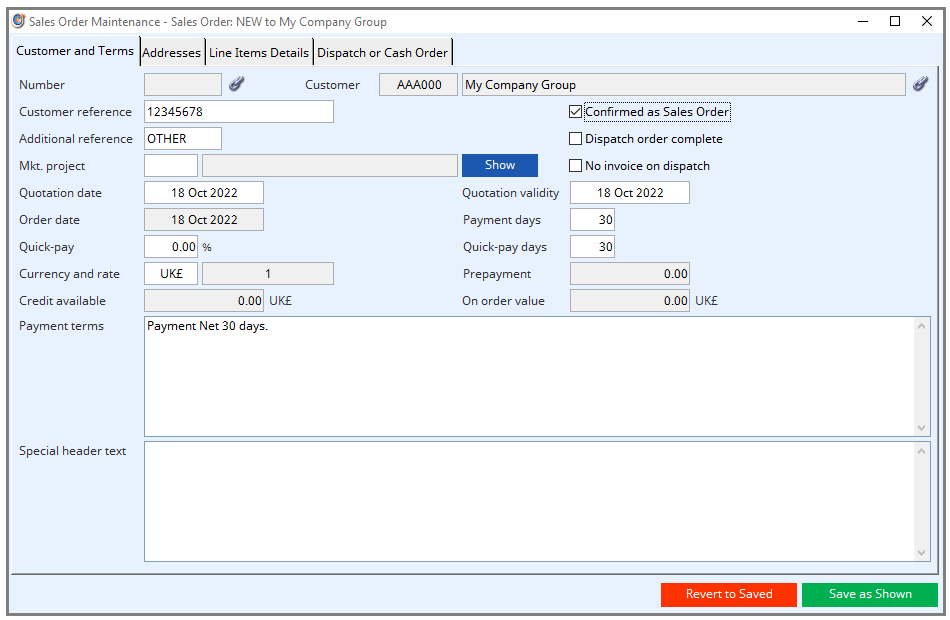
It is often useful to enter a Customer reference which could be the customers purchase order number or something else of relevance and an Additional reference that you may have devised to internally classify sales. Note that at this time, there is no Number for the document. This is because until you confirm what you are doing, no Sales Order Number will be assigned to the document. Explore the purpose of other fields on this tab pane at your leisure using Window Tooltips or the help system.
Switching to the Addresses tab pane, you will see further details of the order in general. In particular there are two addresses – Invoice and Delivery. Both of these can be either a stored address/contact of the customer or can be Individual, which is typed in freely and only applies to this document.
The main content of a Sales Order however is the Line Items on the third tab pane.
Adding Line Items
A Sales Orders can have up to 999 line items and each of these are for the supply of a quantity of a part (or a kit of parts or a non-part) to be dispatched on a particular date. Sales Order Line Items are the entity of sales to customers and in Caliach Vision they generally automatically generate Invoiced sales.

The Line Item tab pane contains a list of items and below that a tab pane containing details of the selected line item. You can add line items by clicking on the Add button or you can drag-and-drop parts from the Parts ScratchPad onto the list. Let us click on the Add button and enter A in the part number and press the tab key. Part number AHD00080 will be selected. You will receive a warning that AHD00080 is subject to engineering change to which you should answer Yes. You will then get a warning that an Alias part currently has insufficient stock to which you should just click on the OK button. These warnings are optional and beyond the scope of this tutorial.
You now need to at least change the quantity and set the dispatch date, however most other attributes of the sales can be adjusted from their defaults, for example you can amend the description. In this case the description provided comes from the parts standard description but if a customer-part record had been created for AAA000 and AHD00080, that description would be used. The Show Extra Text button will bring up a window containing the parts extra sales individual and standard texts. These always print on a Sales Order (and can optionally also print on an Invoice; see Fig. 4.5).
It should be noted that the Link icon that you will see in many places, is your route into the Linked Documents System of Caliach Vision (also more generally available from ScratchPads→Open Link or Create Link, F11 or F12 function keys). Caliach Vision supports a universal external document linking system that allows you to identify external electronic documents with dynamic data in the programs databases. In this case the icon is beside the part number entry field so clicking on it will open any links that have been set up against the part number showing. In the case of AHD00080, there are two example links so a selection list is first offered. If you double click on the second line a PDF viewer window will open and a document will be displayed. This is an example of External Document Linking. The possibilities here are almost unlimited as Word, Excel, Power Point, PDF, HTML, Picture, CAD drawing or specialist documents can all be viewed (depending on installed software). Web sites and external programmes and services can also be linked. The data records that can be linked to is also very extensive. For example, the customer’s PO could have been scanned into a PDF file and linked to the SO, providing a complete paperless document trail.

If you change the quantity, the price will be re-calculated based on any quantity price breaks in the part or customer-part record. In this case we will change the quantity from 1 to 40 and press the tab key. You will receive a stock warning to which you respond with OK. The List price below remains at 322.23 but you will find that in the Item field list above, the Net price will have changed from 322.23 to 315.79. This is because the part has been set to have an additional discount of 2% for quantities between 25 and 50 which you can confirm by right-clicking on the part number and operating View from the part context menu, then select the Selling tab pane. Complex pricing and discounting arrangements can be set up and up to 5 foreign currency price lists can be maintained.
Tab to the Dispatch due date and enter a date of about 1 month from now. Dates can be formatted to whatever your national preference is in Company Details so for now, don’t be concerned if the order of day month is not your preferred style. When you enter dates in a date field, you can type just the day for this month and year or a day-month (or month-day with an American-style format) for this year. The character used between parts of the date can be virtually anything you wish and you can use characters for months or their numeric equivalent.
Now click the Save as Shown button on the bottom right of the window. The Sales Order will be given a number and saved to the database.
Explore the various fields on the Item Details tab pane using Window Tooltips (Ctrl+H), then switch to the Pricing Details and Additional tab panes and explore those. Finally on the Planning tab pane, you will find the quantity information for the part. While this provides useful information in itself, it also provides access to drill-down by double clicking on any of the fields to provide you with projected stock movements, movement history, MRP results and deeper into individual documents associated with the part such as pending Purchase or Work Orders.
Printing the Sales Order
Having created a sales order, we need to print the Sales Order Acknowledgement. Right-click on any plain area of the Sales Order Maintenance window (or use the Sales main menu or navigate Processing→Sales Orders) and select the Print Sales Order or Quote (Ctrl+P) menu function. The Sales Order Selection window will open which is typical of other document selection windows ?.
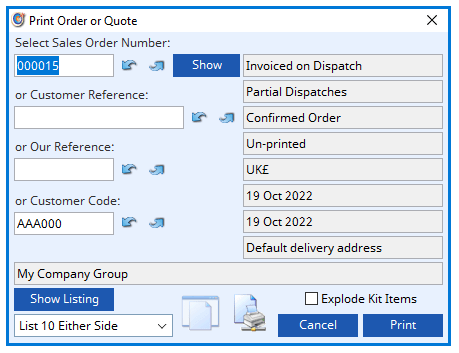
If the Sales order just created is not showing in the window, use the Up/Down arrow buttons to move to it. You could have also typed the number 16 and pressed the tab key or you could have used any of the Customer Reference, Our Reference or Customer Code numbers (or used the ScratchPad or Keyword Search) to find the first of any of the codes entered. At the bottom left there is a Show Listing button and a drop-down list of choices for the listing. This will open a listing window from which you can select the SO you want. This is standard to document selection but as this is selecting a document to print, the bottom right of the window contains controls for printing.
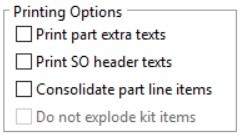
There is a printing option of Explode Kit Items which allows you to print on the Acknowledgement, a breakdown of the components of any Sales Order Kit Items. Caliach Vision allows you to designate BoM Assemblies as Sales Order Kits. This means that with a single item on a SO or Job, a set of parts in different quantities designated by a Bill of Material will be dispatched. You can also have kits within kits, the net sum of which will be dispatched. This feature lends itself to many applications and supports partial dispatch with shortage control.
There are two common destination icons for Screen and Printer report destinations, however if you right-click on them, you will be able to choose any of the 12 alternative destinations. We will stay with the Screen as a destination for now so click on the Print button or press the enter key.
Caliach Vision supports full customisation of reports and printed documents. Our team of experts can create as many versions of a document as you like for different needs. You can request to add and modify any standard report or document and, add to, or substitute it into, the working program. Contact our support team for more details.
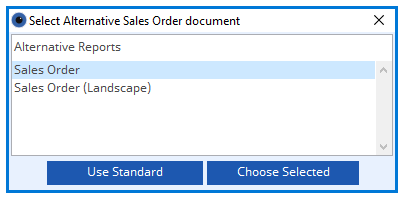
Click on the Choose Selected button and the Sales Order Acknowledgement will render into a window. You can now fully inspect the results of your work and can also do a number of other useful things with this screen report.

- You can drag across an area of the report and copy the contents into the clipboard which can then be pasted into another programme such as Excel or Word.
- Using the first tool in the toolbar, you can send the report on to a printer.
- Using the second tool you can print a single page of the report to the printer.
- Using the sixth tool you can print the report to your desktop.
- Using the seventh tool you can save the report as a PDF.

The full potential of reporting in Caliach Vision is barely touched upon here but suffice to say that all needs are met in the system, often with multiple alternatives, with some particularly useful innovations such as direct emails with PDF format attachments.
Dispatching the Sales Order
You can round off the sales process by dispatching, sometimes known as shipping, the goods to the customer. We will assume that the parts ordered are in stock, or at least some are, and we decide it appropriate to partially ship what we have now.
Normal business operation for most manufacturers would not involve jumping straight from creating a SO to dispatching it. This is only possible in a substantially Make-to-Stock environment and even then it would be normal to investigate the availability of stock with respect to other commitments to other customers. Caliach Vision supports this process with a number of review and analysis tools. More typically the SO would trigger production, which would be handled by MRP (Material Requirements Planning), WOs (Work Orders), Capacity Planning and Shopfloor Data Collection before Dispatch would take place. Consider this when further on in this tutorial, these topics are covered.
For now, we will dispatch 5 of the 40 ordered of our new Sales Order for illustration purposes. To record the dispatch, select the Process→Dispatch→Dispatch Items menu function. The Sales Order Dispatch window will open along with the SO selection dialogue window. Choose your new SO in the selection window and click OK. A warning will then pop-up saying that the SO has not been printed yet. This is because the system does not recognise printing to screen as a full print job (as the system hands control to the screen window and does not know whether you passed the report on to the printer for a ‘hard copy’.) Answer Yes to this warning as we want to proceed. You then get a further warning that the part AHD08000 is subject to Engineering Change. This is a control that can be set for a part that is designed to notify users when a part may be subject to special attention, typically by the engineering department. A system option can be used to make this a preventative tool so that the parts use is prohibited but in this case, it is set only as a warning. Click on the Yes button. The dispatch window will then take control and list the single line item for 40 of the part AHD08000.

We call this type of list a grid and it behaves differently than those lists previously encountered. It is more like a spreadsheet, in that you can use the tab key to pass through cells and rows, editing data as you go. In this case there is only one row so just use the mouse to select the 0.000 in the Shipped column. Enter 5 and press the tab key and the comment will automatically change. We are recording a partial dispatch of 5 of the 40 ordered.
When a dispatch takes place within Caliach Vision, sales order items are turned into sales history and a Dispatch Note is created from the Sales Order Header data. Unless the SO is marked for No Invoice on Dispatch, an Invoice will also be produced and appropriate postings will be made in the Accounts Receivable (Sales) and General (Nominal) Ledgers. Stock will also automatically be adjusted.

Before clicking to process the dispatch, you may want to un-check the Print Dispatch Note and Print Invoice options to avoid unnecessary printing as, after processing these documents will otherwise automatically print. In fact a dispatch is one of the most intense processing activities in Caliach Vision, encompassing some or all of the following:
- Shortages for incomplete Exploded Kit components will be created.
- Invoice records are created.
- Sales History, used as Invoice line items, will be created.
- Sales Order Line Item records will be adjusted or deleted if there is no outstanding quantity.
- Sales Order Header records will be deleted if no SO Line Item records remain.
- Part Due to SOs, Period Usage and Physical quantities will be adjusted.
- Multi-Location record Quantities will be adjusted or records deleted if zero.
- Tracking records will be created.
- Product Serial Number records will be related to an assignment.
- Customer On-order and Outstanding invoice values will be adjusted.
- Stock History records will be created.
- Ledger transactions for the Invoice will be created.
- Any relevant General Ledger account balances/turnovers will be updated.
- Any externally linked documents will be re-linked to history.
- Workflow Triggers, if set, will send internal or external messages.

Now click on the Confirm Dispatch as Listed button and at this point, if further information is needed to complete the dispatch, additional windows will open in which this information can be provided. In this case a system option has been set to record trade statistics (needed for European Union trading) so a window will open for that. Confirm with an OK. Other such windows could include Batch Identification and Serial Number Assignment, depending on part and other settings.
When processing is complete, you will receive a confirmation message which gives the Dispatch Note and Invoice Numbers of the documents produced.
Printing the Invoice
If you did not print the Invoice at the time of dispatch, you can print it now by using the Process→Dispatch→Print Invoice or Credit Note menu function. This will open an Invoice or Dispatch Note selection dialogue similar in operation to the Sales Order selection dialogue window encountered previously. The default document in the window is likely to be the invoice just created but if not, press the Delete (Del) key then tab key (to get the first invoice on the system) and then click on the Previous arrow button next to the invoice number box. This will take you to the last invoice on the system which is the one you have just produced.
There are a number of things you can do at this time to amend the Invoice, most significant of which is adjust the payment due date.
Review History
Once a dispatch has taken place, sales history is created and this can be reported from the Process→Dispatch→Print Sales Item History Reports menu function. This window is a typical reporting window as discussed in Finding Your Way Around: Reports and Destinations, earlier in this tutorial. Extensive selection and sort sections are available so that you can target exactly the sales data for review. Try out a few of the reports by selecting from the list at the bottom left. You can also restrict the report to just parts selected in the Parts ScratchPad by dragging and dropping your selection onto the reporting window.
At this point we are going to move on to the Ledgers accounts functionality of the programme before returning to production management issues.