Caliach ERP Tutorial
This tutorial is designed for those who are completely new to Caliach Vision ERP and want to know how to use the free Demonstration Software.
System Flexibility
- System Preferences
- System, Group and User Settings
- Options
- Custom Reports
- Custom Features and Plug-Ins
- Custom Code Hooks
Caliach Vision is a generic manufacturing ERP software system. Generic, because it is not specifically tailored to one particular industry or manufacturing sector. It can be adapted for use in many different types of manufacturing or processing environments, from chemicals to electronic assembly and from sports cars to perfumes. There are certain industries that need specific software but they are in the minority. Most manufacturing business have the same basic administrative processes and it is rare that an industry is so special in the way it operates that it cannot comfortably use the generic structures and functions of Caliach Vision..
Different industries do have different needs however and Caliach Vision provides for this comprehensively with numerous preferences, settings, options and custom capabilities that control programme behaviour or add to it. Many of the choices available would be set up when the programme is first installed but many can be switched on when your need arises.
This tutorial section is an introduction to the functionality in Caliach Vision that makes it so flexible in the way it can be used.
System Preferences
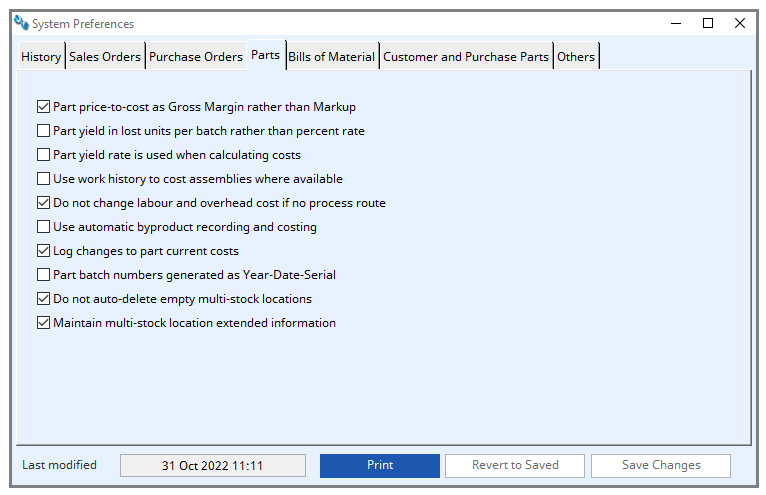
Company Details and System Preferences are two windows in which you can set up the datafile for your particular business. They are both available on the File→System Manager menu.
Company Details is the first port of call when starting out. It is in here that you tell the system all about your business and other operational settings.
System Preferences control both the display of information and the collection of data. The example illustrated in Fig. 9.1 shows various switches for parts.
Both company details and system preferences are part of a single set of rules and values that apply to the entire database operation.
System, Group and User Settings
A further set of rules and values apply at a user level and this is combined with the access and security arrangements for the system. You can have any number of users set up who can log into the data, subject only to the licensed concurrent user limit you chose. Each user can belong to any number of Groups. These Groups are typically used to afford menu access privileges so for example, you may have a Sales group, a Purchase group, an Accounts group etc. If a user is set to belong to two or more groups they will be granted the privileges of all of them. Furthermore, their privileges can be enhanced, or reduced, at an individual user-level.

At each of the Group and User levels and additionally at a System level, there are what are called Settings. You will see these if you operate File→System Manager→Privileges and Settings. If you select the Group, User or System tab panes, you will see inside a further tab pane section of the window that contains all the settings for a selected group or user or the system.

Some settings only exist at the user level but most can be set at each of the three levels. They apply in a hierarchical manner so that all users have the System settings, then any group membership will lead to those group settings being added or overwritten and finally, the users settings are added or overwritten. Some settings, such as Custom Reports, Custom Features and Options are additive and the others overwrite the higher level values. As an example, let us look at the ScratchPads and we should start at the System level so click on System on the upper tab pane (Fig. 9.2) and then the ScratchPads inside tab pane (Fig. 9.3).
The column data for the four ScratchPads can be customised here to suit the different needs of each user. At the upper left there is a dropdown list of the four ScratchPads and below that, the list of available data columns that can be used. In the case of Customers and Suppliers, this also includes address and contact table columns. The list on the right is a list of the columns and associated headings that make up the ScratchPad design.

To add a column, simply drag it from the column list and drop it onto the design list. To delete a column from the design list, click on it and press the Delete (Del) key on your keyboard. If you want to change a position of a column, drag-and-drop within the design list. The standard column descriptions, by default, go in as the headings and it is a good idea to shorten these so a sensible heading text applies. To do this, double-click on the line and then you can edit the heading text within the list.
Note that the justification of the column – left, right or centre – is determined automatically from the columns data type. A number column is always justified right for example, so it is not a good idea to have the last column as a number column because it ends up well off to the right.
You can also add calculated columns, for example a sales price in a foreign currency, or the 7th to 12th characters of the part number which may be useful so that you can sort by this, then select a group of parts for reporting purposes. Calculations can be extremely complex involving the full power of a rich set of functions but this is getting beyond the scope of this tutorial.
Typically, you design a system-level standard ScratchPad which every user has and then make a tailored ScratchPad at a user- or group level for special needs.
Options
Options can be thought of as programme switches or controls in a similar fashion to system preferences but as they are part of the settings system, they abide by the settings hierarchical nature. There are over 130 options and each has a name with a potential value. Some, because of what they do, can only be set at a system level so apply to the operation of the programme for everyone.

Options control the behaviour of the programme and are commonly used to implement industry-specific needs, or at least some feature or behaviour that someone in the past has needed.
The Options tab pane contains a single large text field in which options can be entered, followed by an equals (=) character, followed by an appropriate value. At the bottom left of the tab pane is an Options List button which opens a window containing all the options appropriate to the setting level. Each has a short description of what it does. You can drag-and-drop option lines onto the options text field to save typing.
Options can also exist at a License and Terminal level ?. License options apply to all databases used under your software license and Terminal options apply to a particular Caliach Vision installation and so to the particular computer being used.
A user can change their own settings by using File→Preferences→User Settings if they have been granted the privileges to do so.
Custom Reports
Caliach Vision is a programme written in a very advanced, object-based, rapid application development programme called Omnis Studio. Our experienced programmers can develop any customised reports and windows you require. These customisations may be free of charge depending on which of our three support packages you have opted for.
A comprehensive Change Management System ensures that your customisation is seamlessly integrated into the normal standard programme and can migrate simply from one version to the next.
Once you have a custom report and deployed it to all working copies of Caliach Vision, you will need to tell the system where the report is to be used and by whom. This is achieved in the Custom Reports tab pane of the Settings. Any reports in Caliach Vision can be either substituted by, or supplemented with, one or more custom designs.
So for example you may have a number of different Invoice designs for different circumstances. In this case, when a user prints an invoice, they will be prompted by the programme to choose which design to use. A case in point would be a design to be used when printing on headed stationary and one for sending as a PDF attachment to an email which would need full company details and maybe a logo graphic.
Custom Features and Plug-Ins
Reports can sometimes have their limitations. In some situations, the programme seeks out and analyses data before printing the report and in those cases, where you may want to customise the analysis, a simple custom report is insufficient. There are also occasions where you may want a complex report drawing from multiple sources of data, which means that a customised standard report will not do. In such situations, a report can be produced from a Custom Feature. A custom feature is essentially a window designed for a purpose that can be opened from the User menu on the main menu bar. Such custom features have to be registered in the Custom Features tab pane of the Settings in a similar way to Custom Reports.
In the demonstration program, operate User→Demonstration→Demonstration Custom Window. This will open a simple example with a button that displays a message which may not seem useful, but that button could have done just about anything!
In fact there are a number of Custom Features built in to the standard programme which you could set up in Settings. Operate File→Preferences→User Settings, click on the Custom Features tab and then click into the first line of the list. Enter Calculators in the Section column, then wOptBushCalculator in the window class column. Type this exactly with the same upper and lower case characters, then tab and the title will be entered for you. Save the settings. Now have a look at the User menu and you should see an extra Calculator group and a menu item for Bushing Weight Calculator.
Custom Features can add pretty much any functionality to Caliach Vision. The opening of the window can install menus, connect to other data sources, operate internet activities and so on with the list being almost endless.
Beyond Custom Features, Caliach Vision can also be extended by plug-ins. A plug-in is a complete library of functionality that is placed in the PlugIns folder within the Caliach Vision installation. After you log in to Caliach Vision, any libraries in that folder are automatically opened. Depending on the design, additional menus would be added to the menu bar allowing you to access its functionality. This approach is most useful where you want to add substantial additional functionality that is best maintained in a self-contained programming unit. For example, if you had a substantial rental service as part of your business model, a suite of appropriate functions looking after the rental side of the business could be developed and deployed as a plug-in.
We have now, briefly, reviewed the flexibility of the Caliach Vision system to accommodate most business needs, regardless of how special they are. In the following section of the tutorial, we will look at how the system is best implemented in a business and what tools are provided to make this as painless as possible.